2012 Projects
|
| Does wrapping up my career at Temple University, finishing off two major
consulting gigs, packing up and selling my house count in the list of completed projects
for 2012. How else to explain my seemingly slow start to the 2012 season of costly repairs
in exotic locations, otherwise known as cruising? How about the hand holding that is done
as one's child goes through the college admissions process? |
| 2012 didn't start off too well. In fall 2011 I had jammed the sail head
car of the in-mast furling system at the top of the mast. This spring the yard took out
the mast in order to fix the problem. When they got the mast out they found that it was
cracked along its seam in the bottom seven feet. Kudos to Travelers Insurance for agreeing
to pay the claim, less my deductible and a wee bit for depreciation, on this. The new mast
will be a conventional flaking sail rig. I really was not at all happy with the in-mast
furling system. The sail had no power and it was a bear to get the sail in and out, mostly
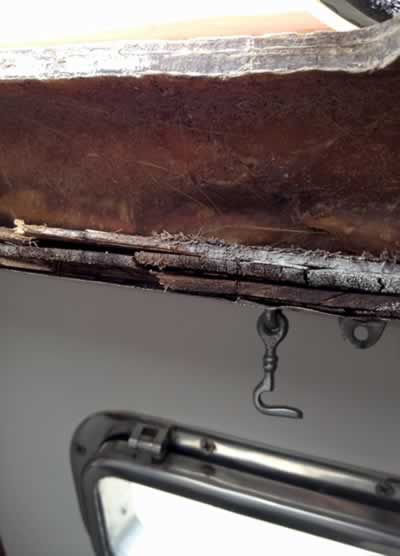
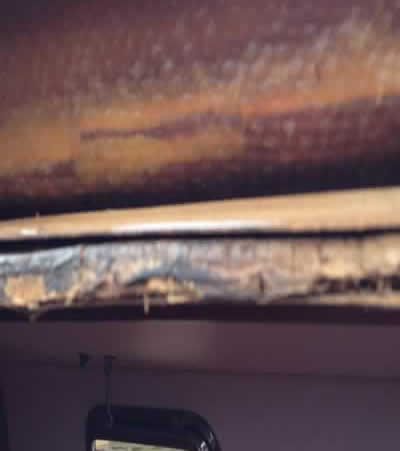
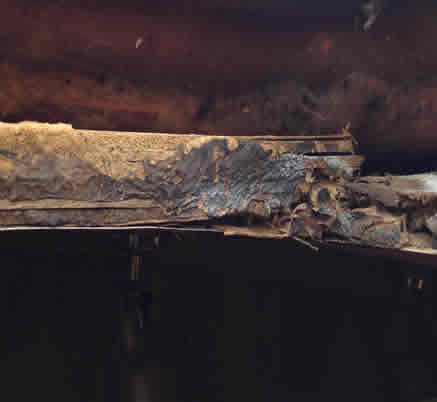
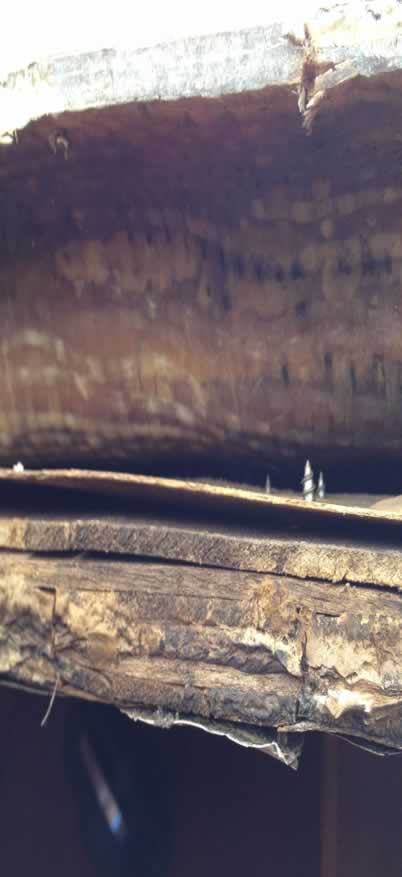
due to the very early vintage of the system. For a mast photo essay go to the installation page. Some of the tasks associated
with the mast installation were left to me. Mostly these tasks involved opening up
the cabin headliner in order to get access to the nuts on various bolts holding hardware
to the cabin roof. The of course it all had to be put back together again.
These tasks are documented below. |
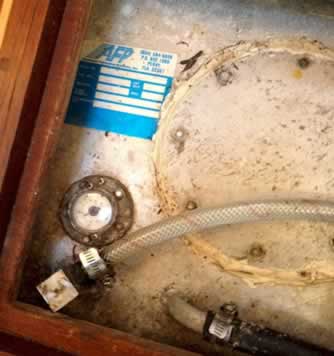 |
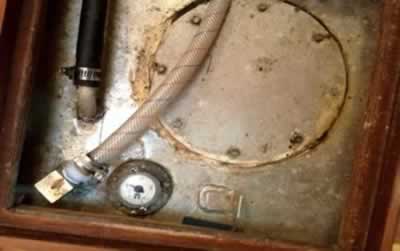
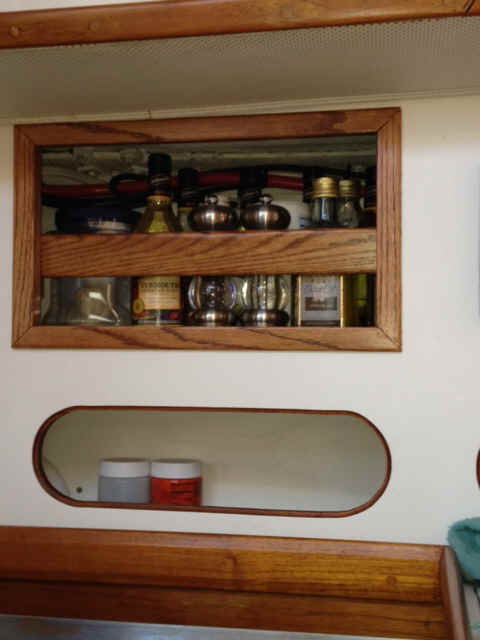
On the to-do list is the replacement of the inspection port gaskets
on the water tanks. Pretty nasty looking gasket. The successor company to AFP doesn't make
gaskets for these tanks used by Caliber. |
 |
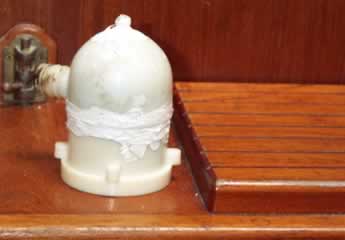 |
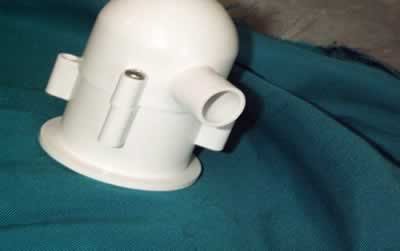
When I commissioned the water system this spring I went to the forward
head and turned on the faucet at the sink. Yikes, who is spraying water on my legs? The
bowl on the forward sink drain had just fallen off. There was a little
thumb screw on the bowl that had just rusted away. The photo below is the aft head drain.
The previous owner threw a little 5200 on it to reduce the leak rate.After much searching
high and low, wailing and gnashing of teeth, I finally found the replacement trap at an RV
web site that is a distributor for Camco (the folks that sell/distribute potable
antifreeze. The sink strainers that I took out, not shown, were pieces of plastic crap. I
replaced them with stainless bar sink strainers that I found at Home Depot. |
 |
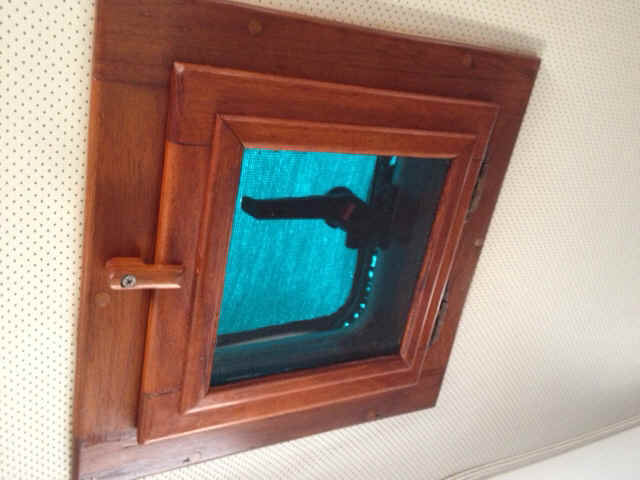
| There had been leaks in the small hatches in the aft head
and over the galley. These would leak only after raining steadily for several days so
checking them out was low on the list of tasks.I started with the hatch over the galley.
To my horror I found that the plywood backer to the headliner had rotted where the water
had been collecting, apparently for years. Again, the previous owner(s) or their boatyard
had found a purely cosmetic solution to a problem: They smeared sealant between the
interior trim and the metal hatch frame. This had the effect of keeping the water out of
the cabin, but also directing it out onto the headliner. In the following frames are some
photos of what I found when I took out the trim around the other hatches.The photo at left
is a close-up of the hatch over the galley. It is not the worst of the litter.The photo at
right and below is the large hatch in the master berth.The plywood is replete with fungus! |
 |
 |
 |
 |
 |
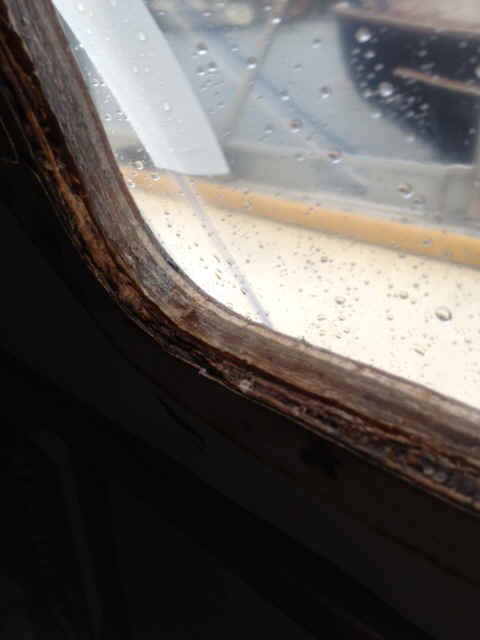
| In the photo at left you can see the rot and also part of the cause. The
opening was cut so large that the frame screws in this one barely caught the fiberglass,
with the result that there wasn't much of the hatch frame lip that could sit on the deck.
What you can't see in the pictures is that the corners were cut way too deep and did not
match the curvature of the hatch frames. In a couple of places it was only the 3M 5200
between the cabin interior and the great blue sky. This is really poor quality workmanship
and disappoints me given the great reputation that Caliber has enjoyed over the years. |
. |
. |
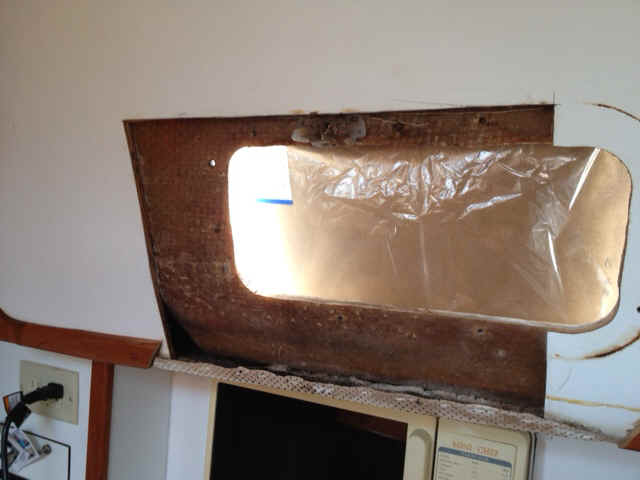
| So, you ask, how do I keep the water out with no hatches in place? Lucky
for me the weather was really good the first two days that I spent removing the hatches.
With the threat of rain I covered the openings with tarps for a night |
Now the boat is snug with shrink wrap tape over the openings. You can also see that
the mast collar is sealed, with black Gorilla Tape.Tony van der Waal, the local fiberglass
man (who rebuilt my holding tank last year) supplied me with the tape to keep things dry
until he can fix the corners and other palces where the openings are just too darn big |
 |
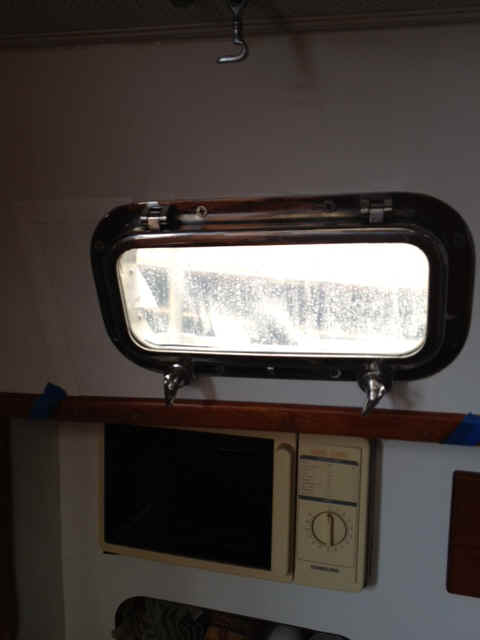
This final pair of hatch photos shows the next to last step and the
finished job. In the end it doesn't look like much, but the four hatches were a lot
of work getting it all done. |
 |
 |
 |
 |
| The sequence of photos above shows another 2012 project that turned out to
be more than I expected. When it rained hard for a few hours a week or so ago I noticed a
single drip of water from the port over the stove. The season I bought the boat I
noticed that the cabin face at that port was puckered and I gave it a poke. Of
course the result was to nearly put my finger through the facing. Having observed a
drip I decided it was time to move the port up to the top of the list. The cabin facing
was formica faced plywood. Apparently this leak had been present for many years,
judging by the rot in the plywood. Since I didn't want to buy 4x8 sheets of plywood and
formica to make a piece that would measure 14" wide by 10" high, I bought a
small piece of white masonite to fill the space in the middle photo. The nearly
finished job is the photo on the left. |
 |
 |
 |
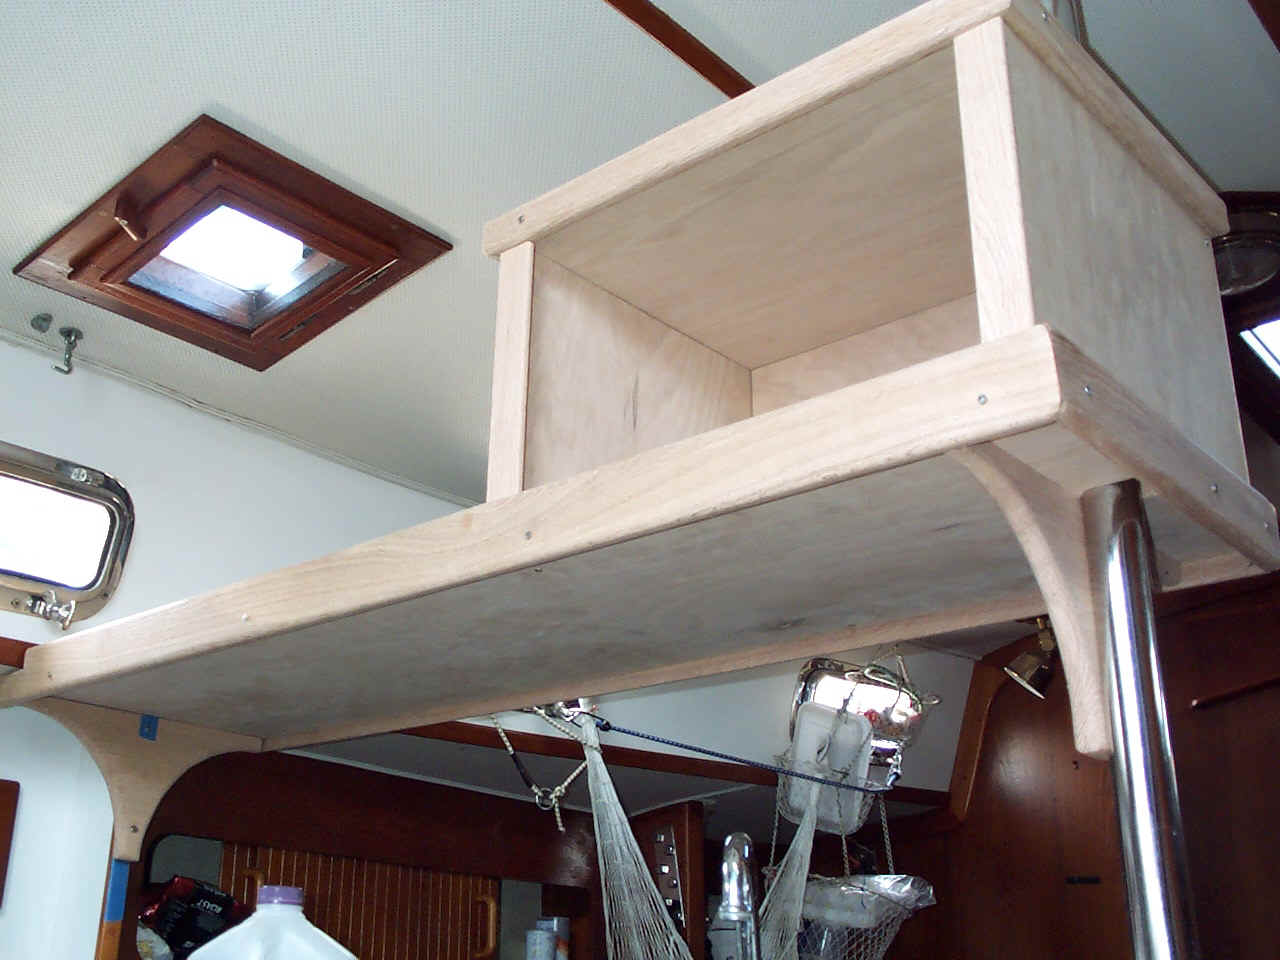 |
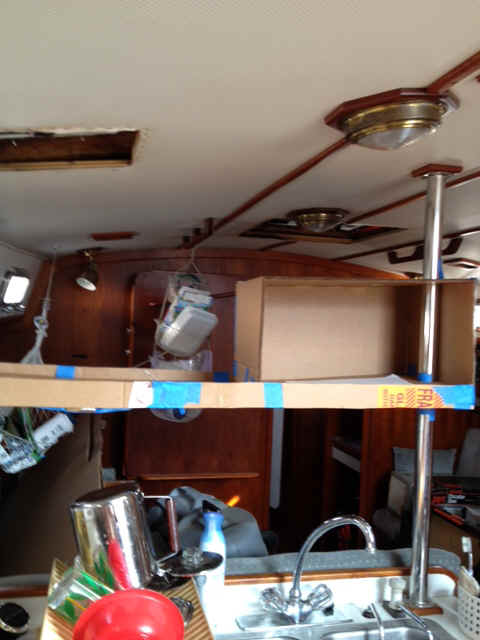
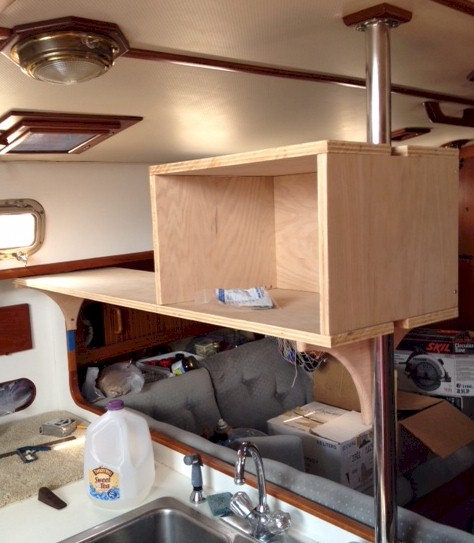
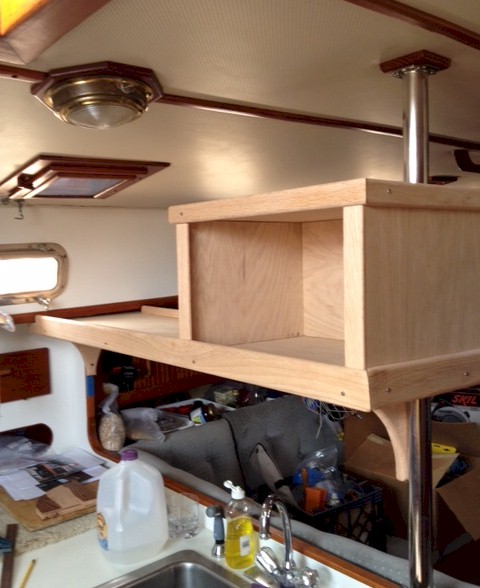
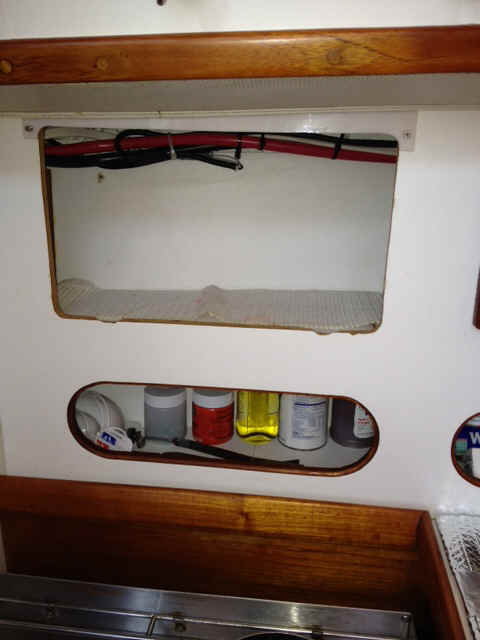
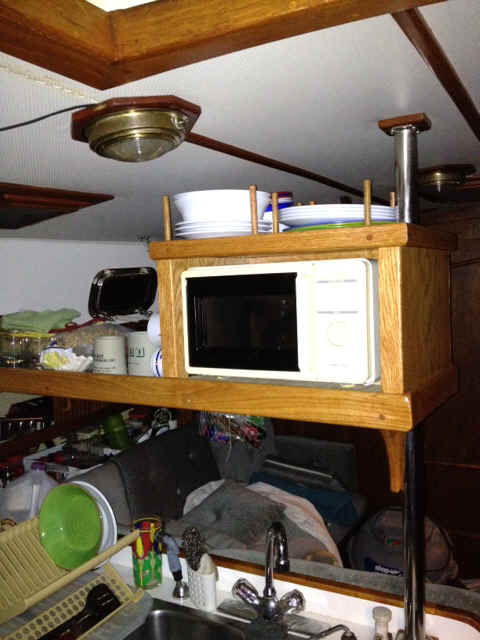 These
are some views of the shelf and microwave box over the galley sink. The original intent
was to do it in teak. The price of teak varies greatly from year to year, and this year it
is rather high. Doing the cabinetry in oak is about 1/5th the cost of teak. After
some effort to find a stain that will give it a color close to the interior teak I have
decided that I will just varnish it. Once varnished it will be more amber in color
and will have a nice contrast to the darker teak. The finished product is shown at
the left. These
are some views of the shelf and microwave box over the galley sink. The original intent
was to do it in teak. The price of teak varies greatly from year to year, and this year it
is rather high. Doing the cabinetry in oak is about 1/5th the cost of teak. After
some effort to find a stain that will give it a color close to the interior teak I have
decided that I will just varnish it. Once varnished it will be more amber in color
and will have a nice contrast to the darker teak. The finished product is shown at
the left. |
 |
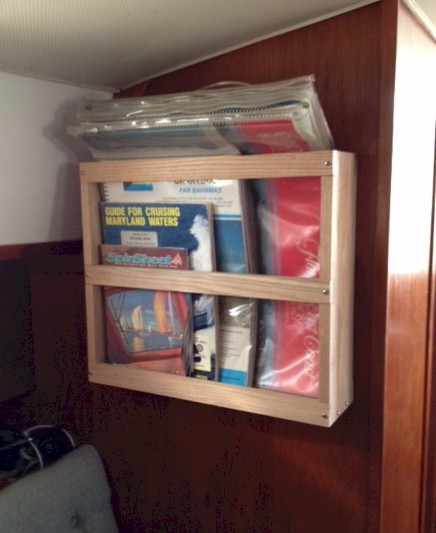
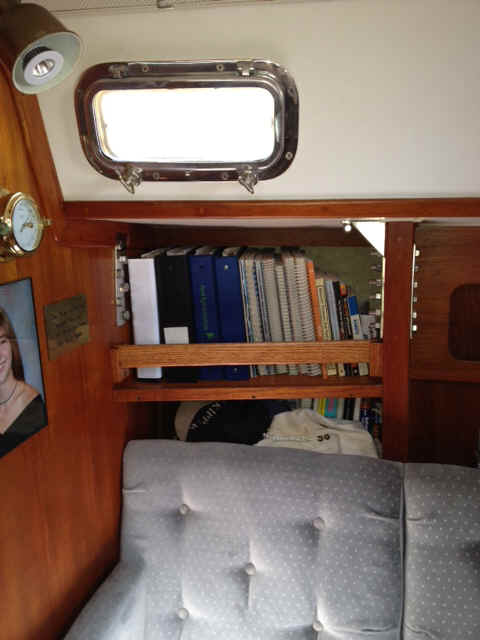
The new bookshelf at left is in my cabin. The books in the shelf
have been living in valuable cabinet space that can be put to better uses. The new
chart rack is in the main salon. The charts have been living under the settee
cushions. At the rsik of sounding like the princess that could feel the pea under 40
mattresses, having the charts under the settee cushions was neither comfortable nor good
for the charts and cushions. |
 |
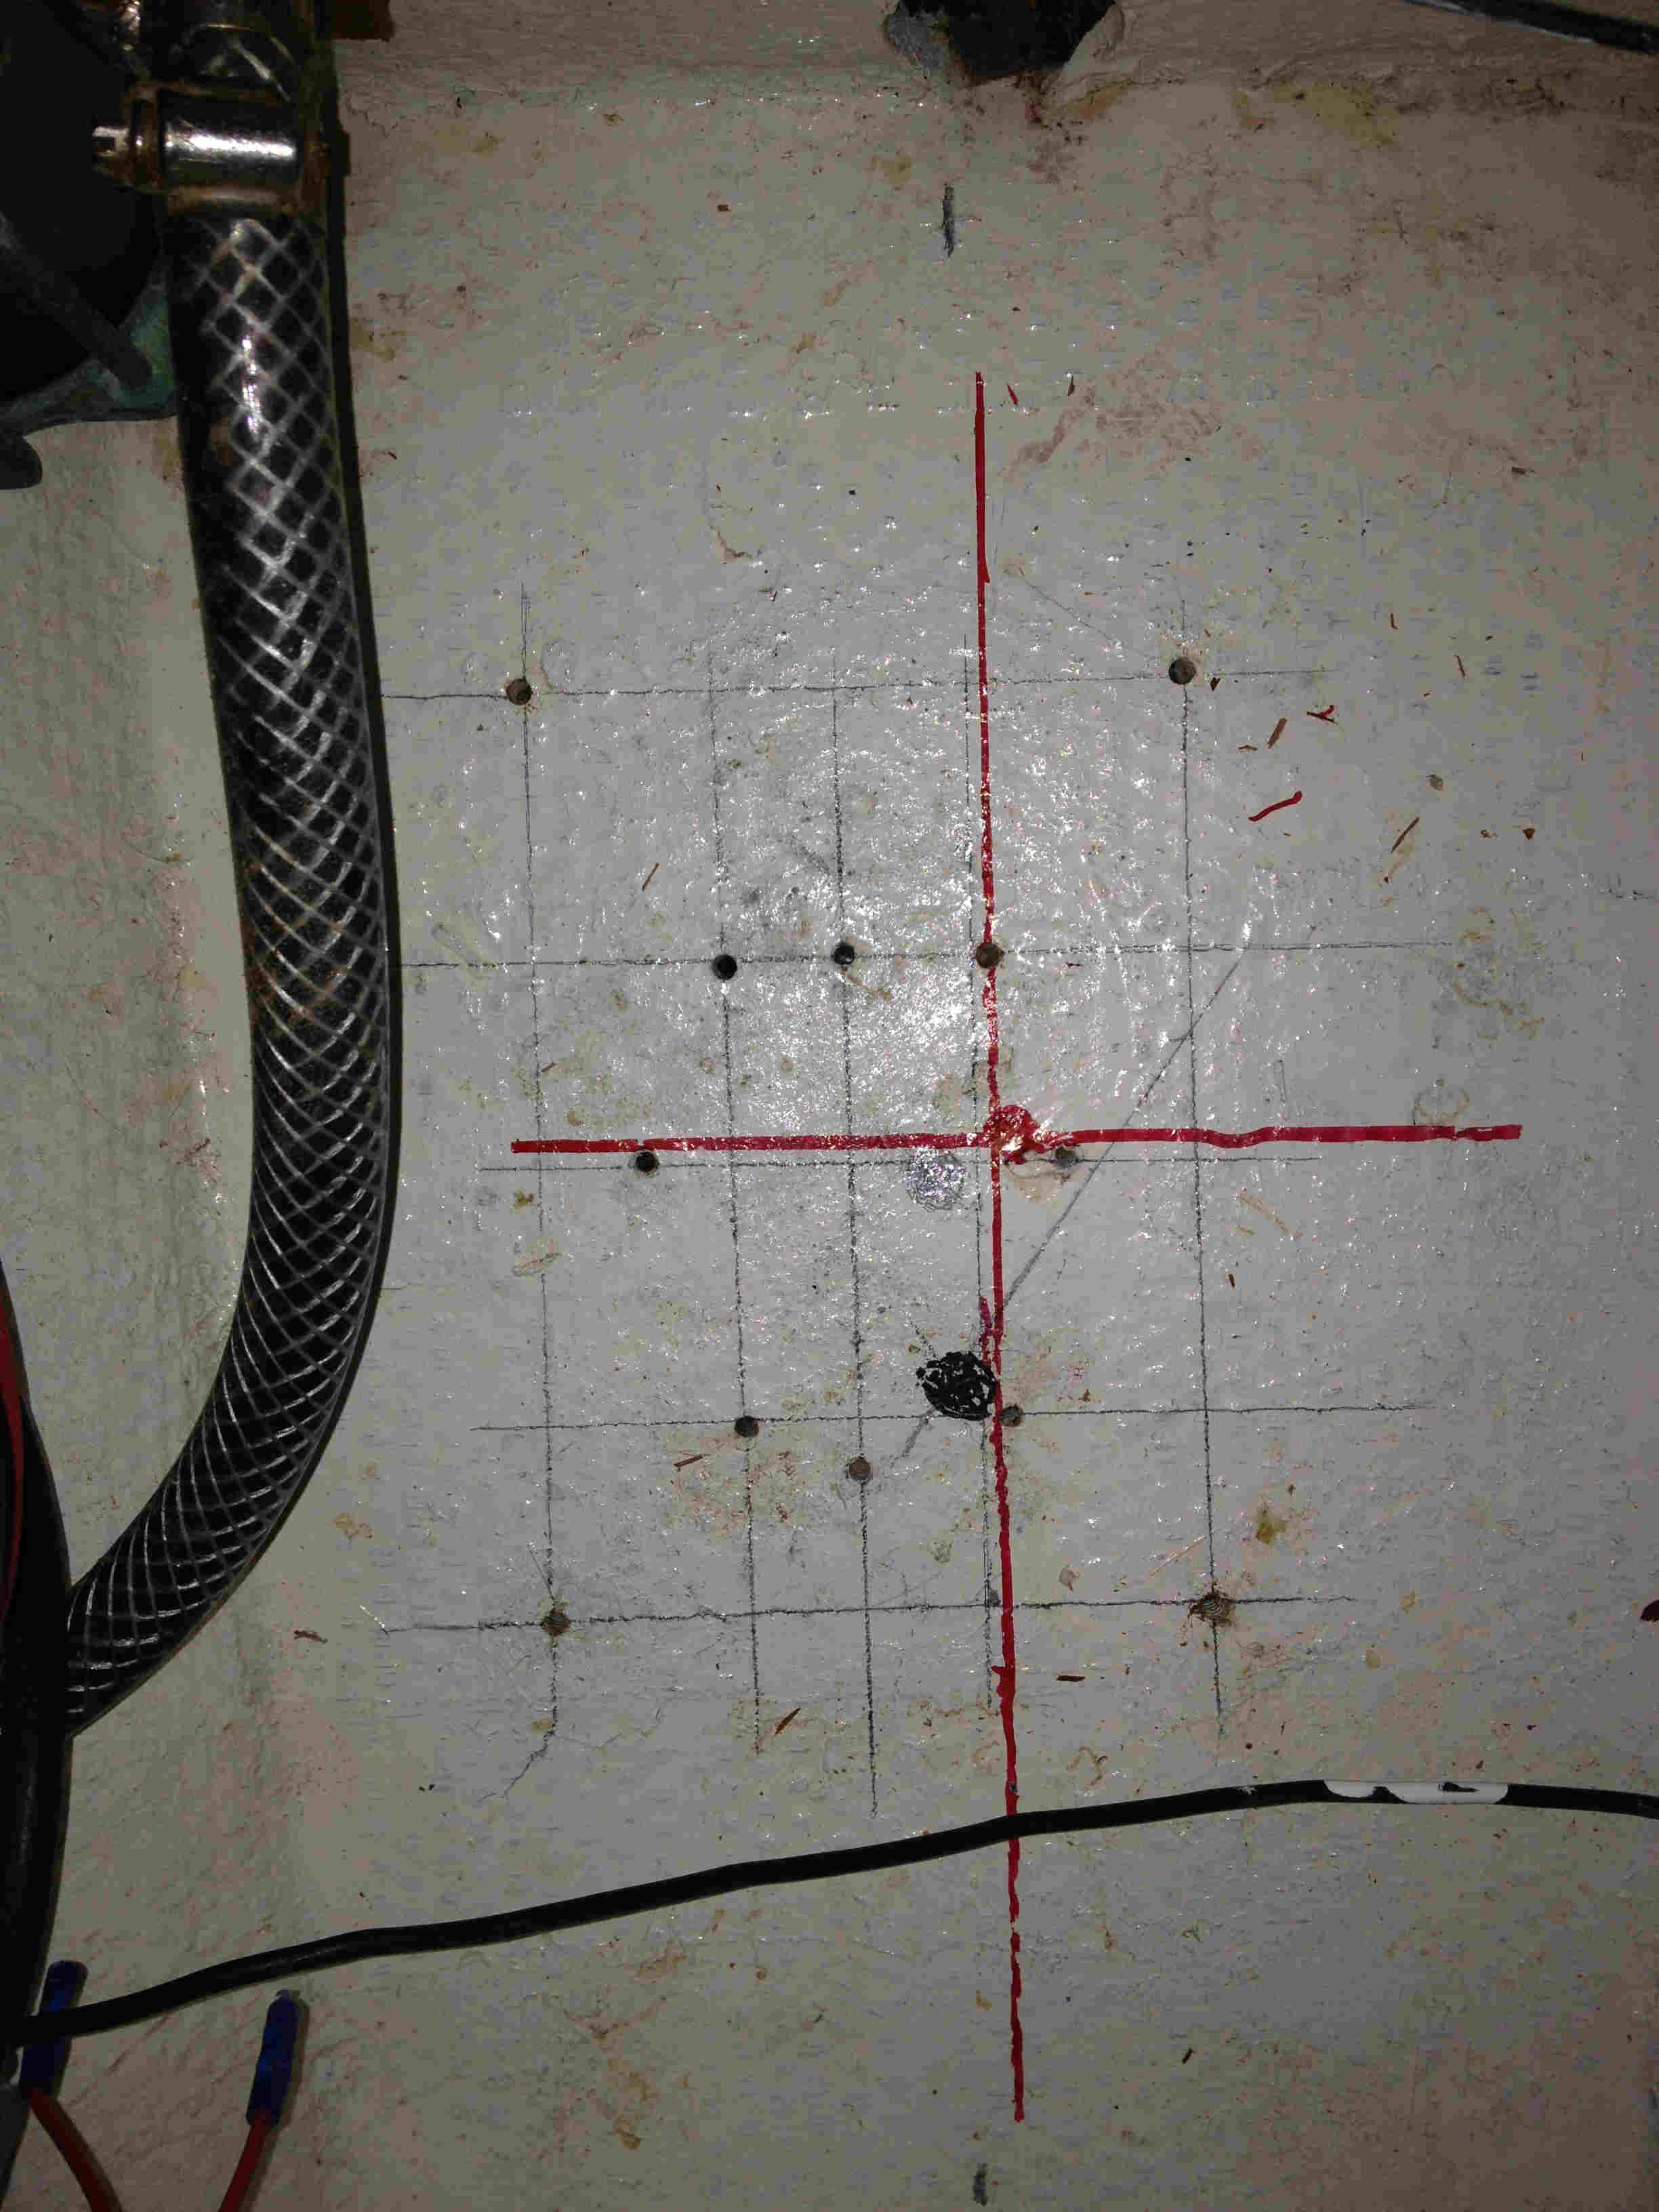 |
After the old mast came out I spent a lot of time looking through
the hole in the cabin sole at the new step placed over the original step holes. Even
allowing for the distortions for perspective and camera angle you see in the photo at
right that the step is too far to one side. In the photo at the left you can see the fruit
of several hours of labor that went into convincing the rigger that the original mast step
was in the wrong place. In a first pass I connected the old holes from two previous masts
like a piece of graph paper. This alone was enough to convince me that the old step
was wrong. Next I found the center of the well in which the mast would be stepped.
That is the black dot. As a next step I got out my levels and plumb bob.
With these I transferred the athwartship center of the mast collar down to the keel
then I transferred the center line of the J-bolt holes down to the step. The result
is the crossed red lines and the red dot to mark where I thought the step should be
placed. Mike Sipala, the rigger, and I then did a few other athwartship measurements
to confirm my red dot. To anticipate the story a little, with the mast stepped in
its proper location the list to port is now largely gone and the boat sails the same speed
on both tacks. |
 |
 |
 |
 |
 |
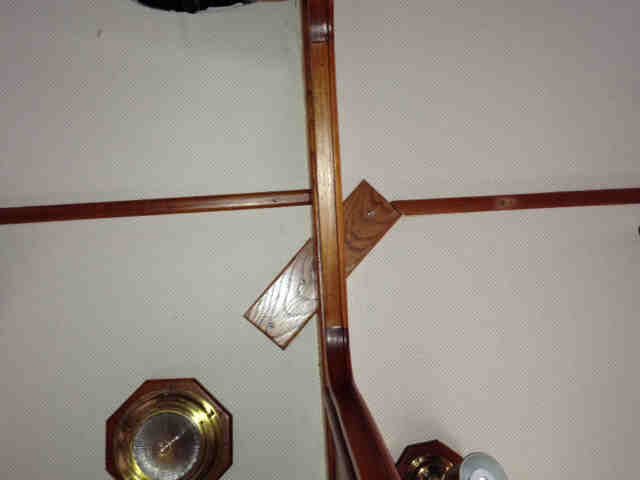
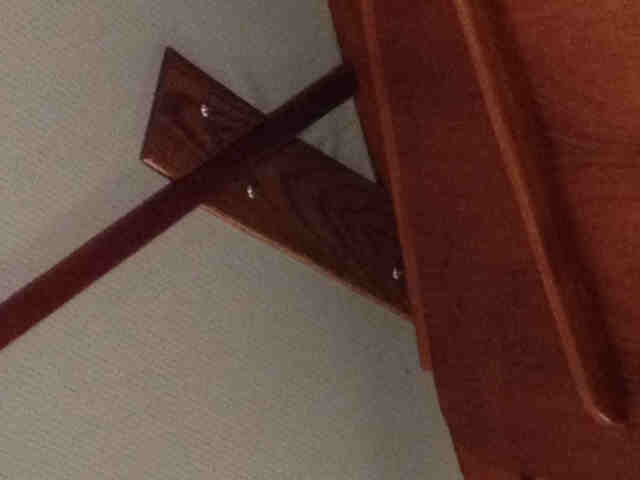
When the old mast was taken out of the boat it pulled apart the teak and
holly veneer of the cabin sole. You can see what I found in the picture two rows
above on the far right. In that picture the missing bit of veneer seems small; in truth
the veneer faced plywood had been pulled loose from the underlayment. In the above row at
the far left the photo shows how I cut back the veneer ply to where I could piece in some
new stock. The middle photo shows the new stock cut to shape. The far right photo in
the above row shows its appearance after stain and varnish. The photo at the
immediate left shows the trim I made to cover the mast hole in the cabin sole so it looks
more finished. In the photo the two pieces don't seem to match in color. This
is an illusion created by the lighting and the iPhone flash. |
 |
 |
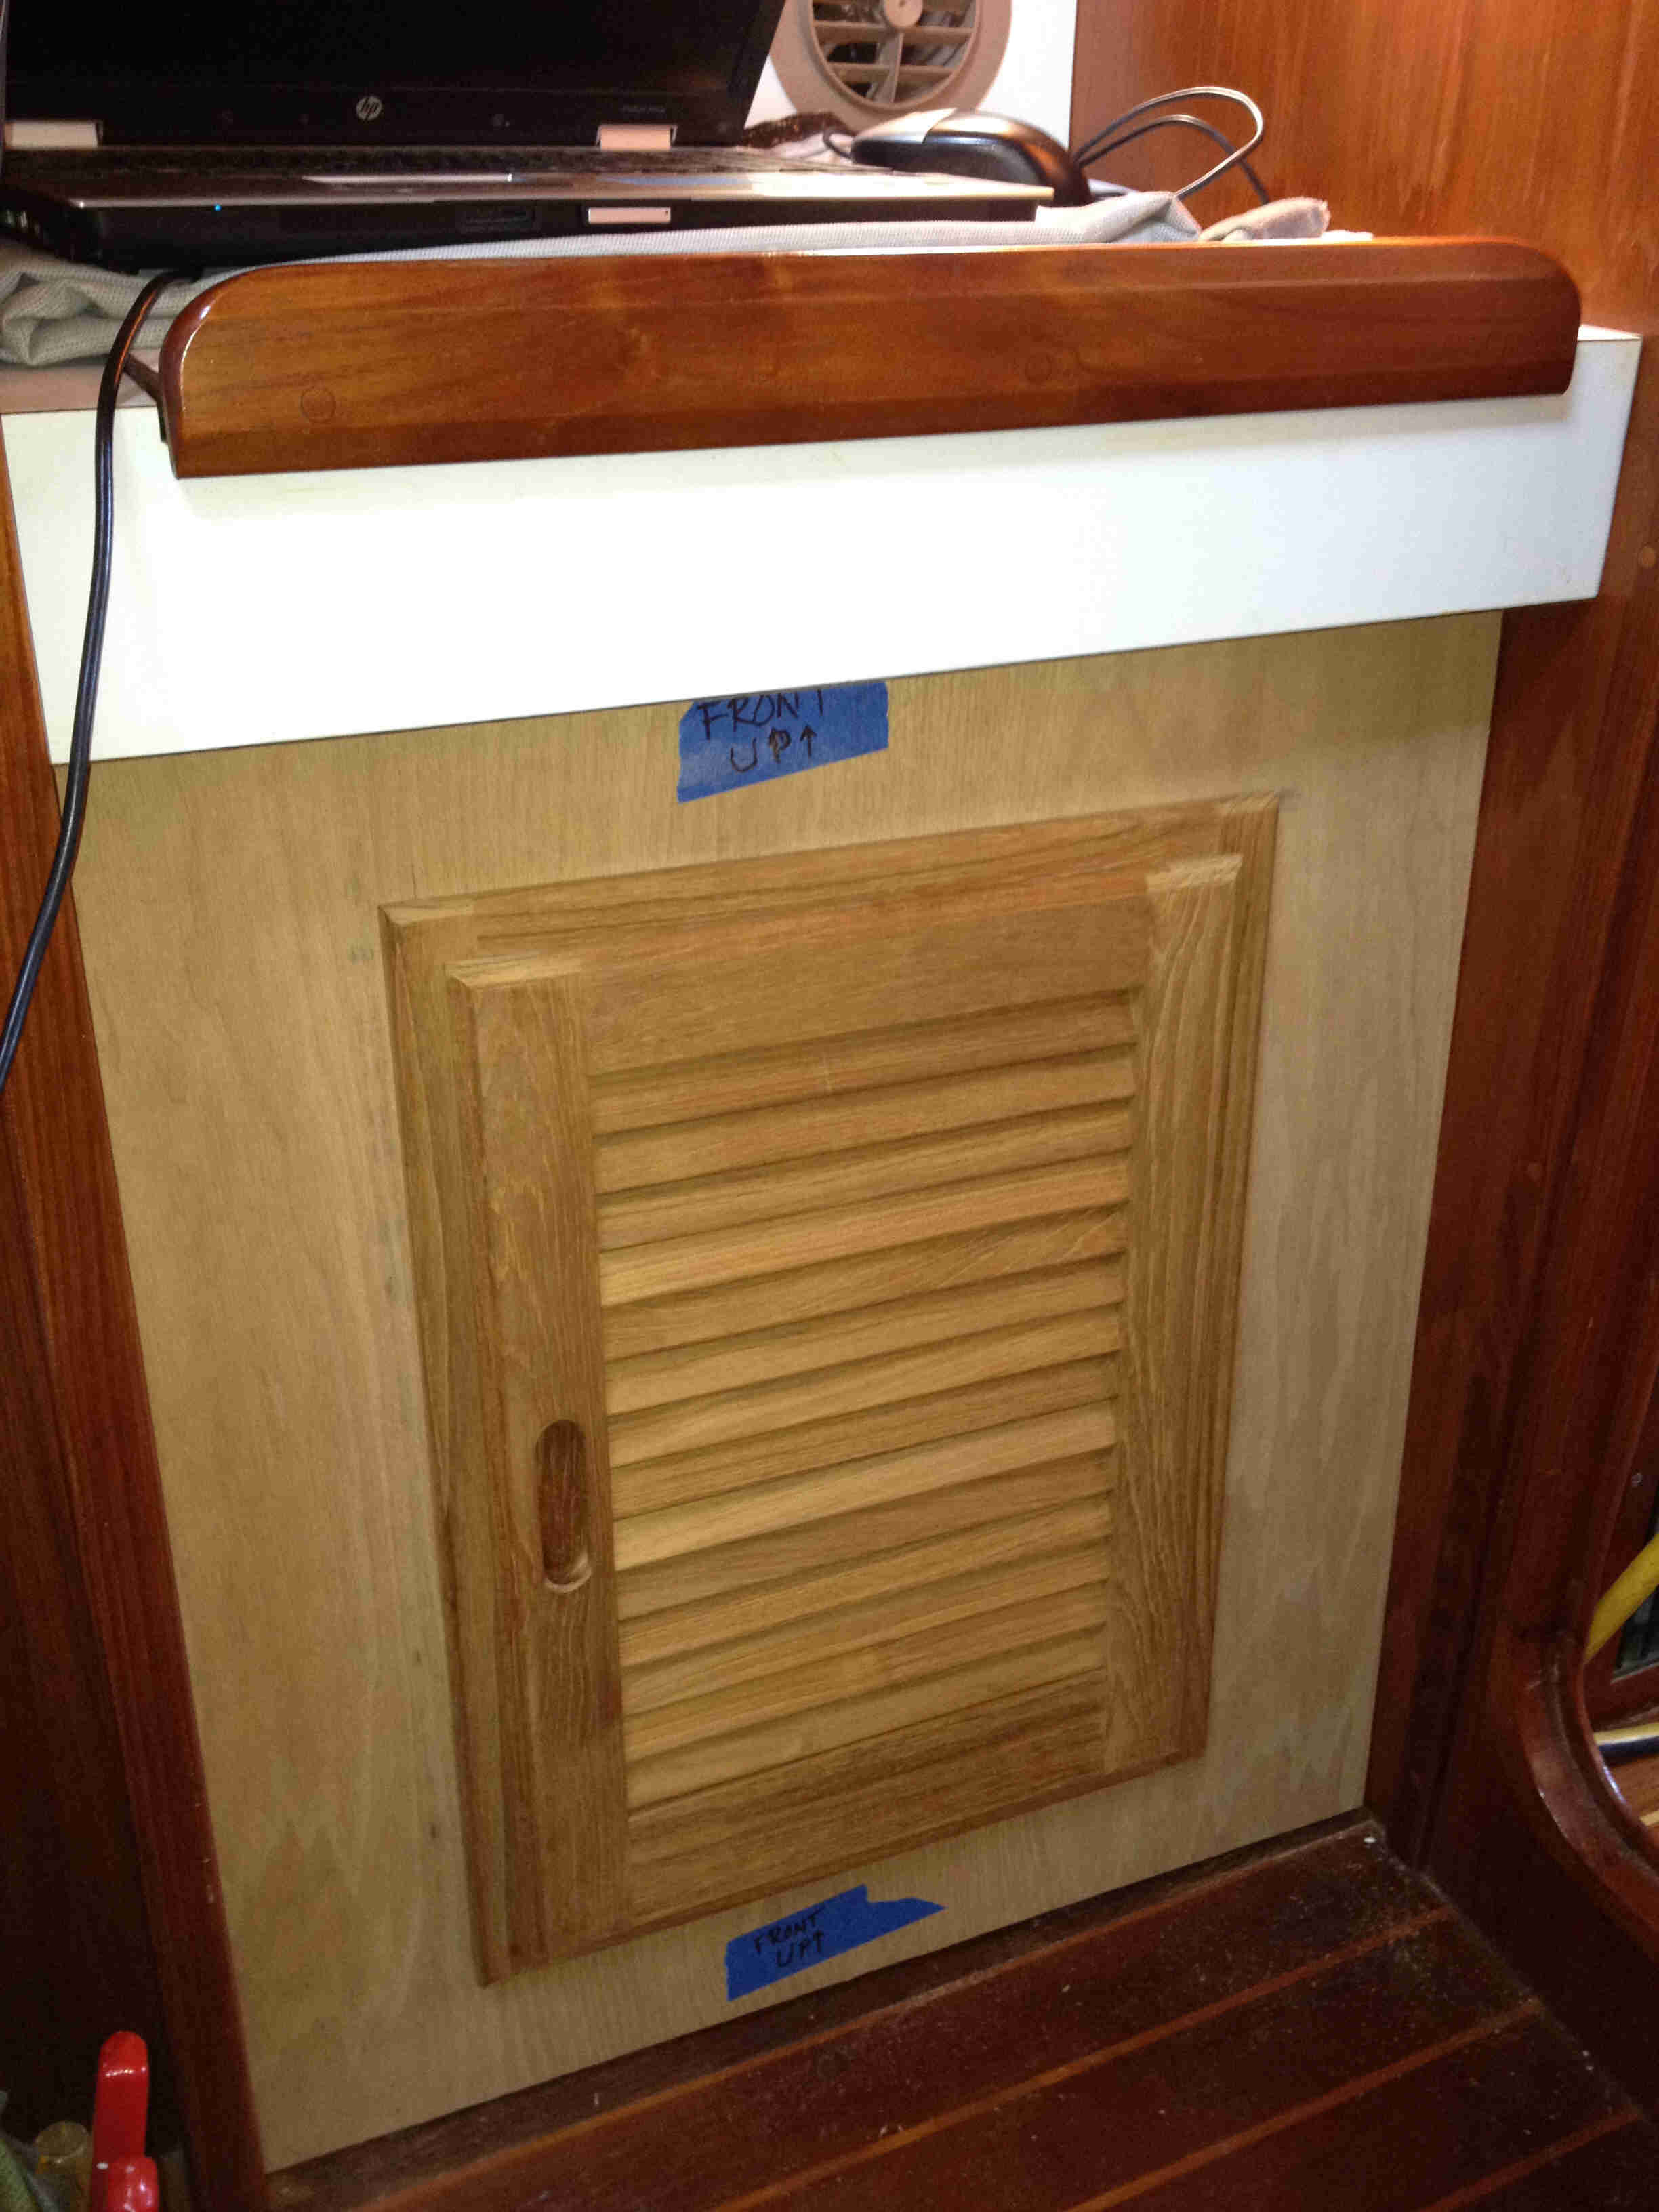 |
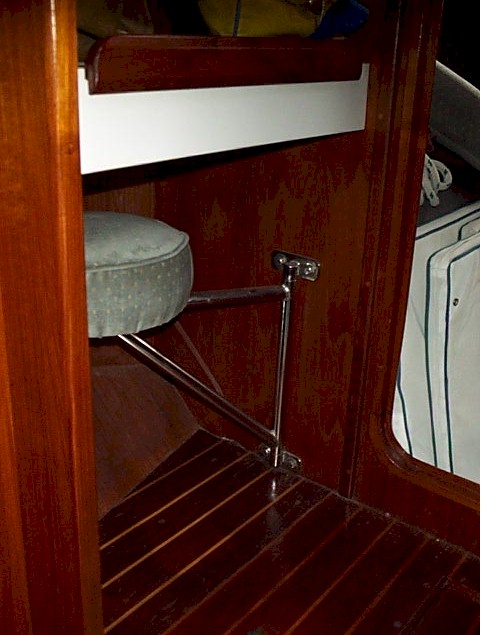
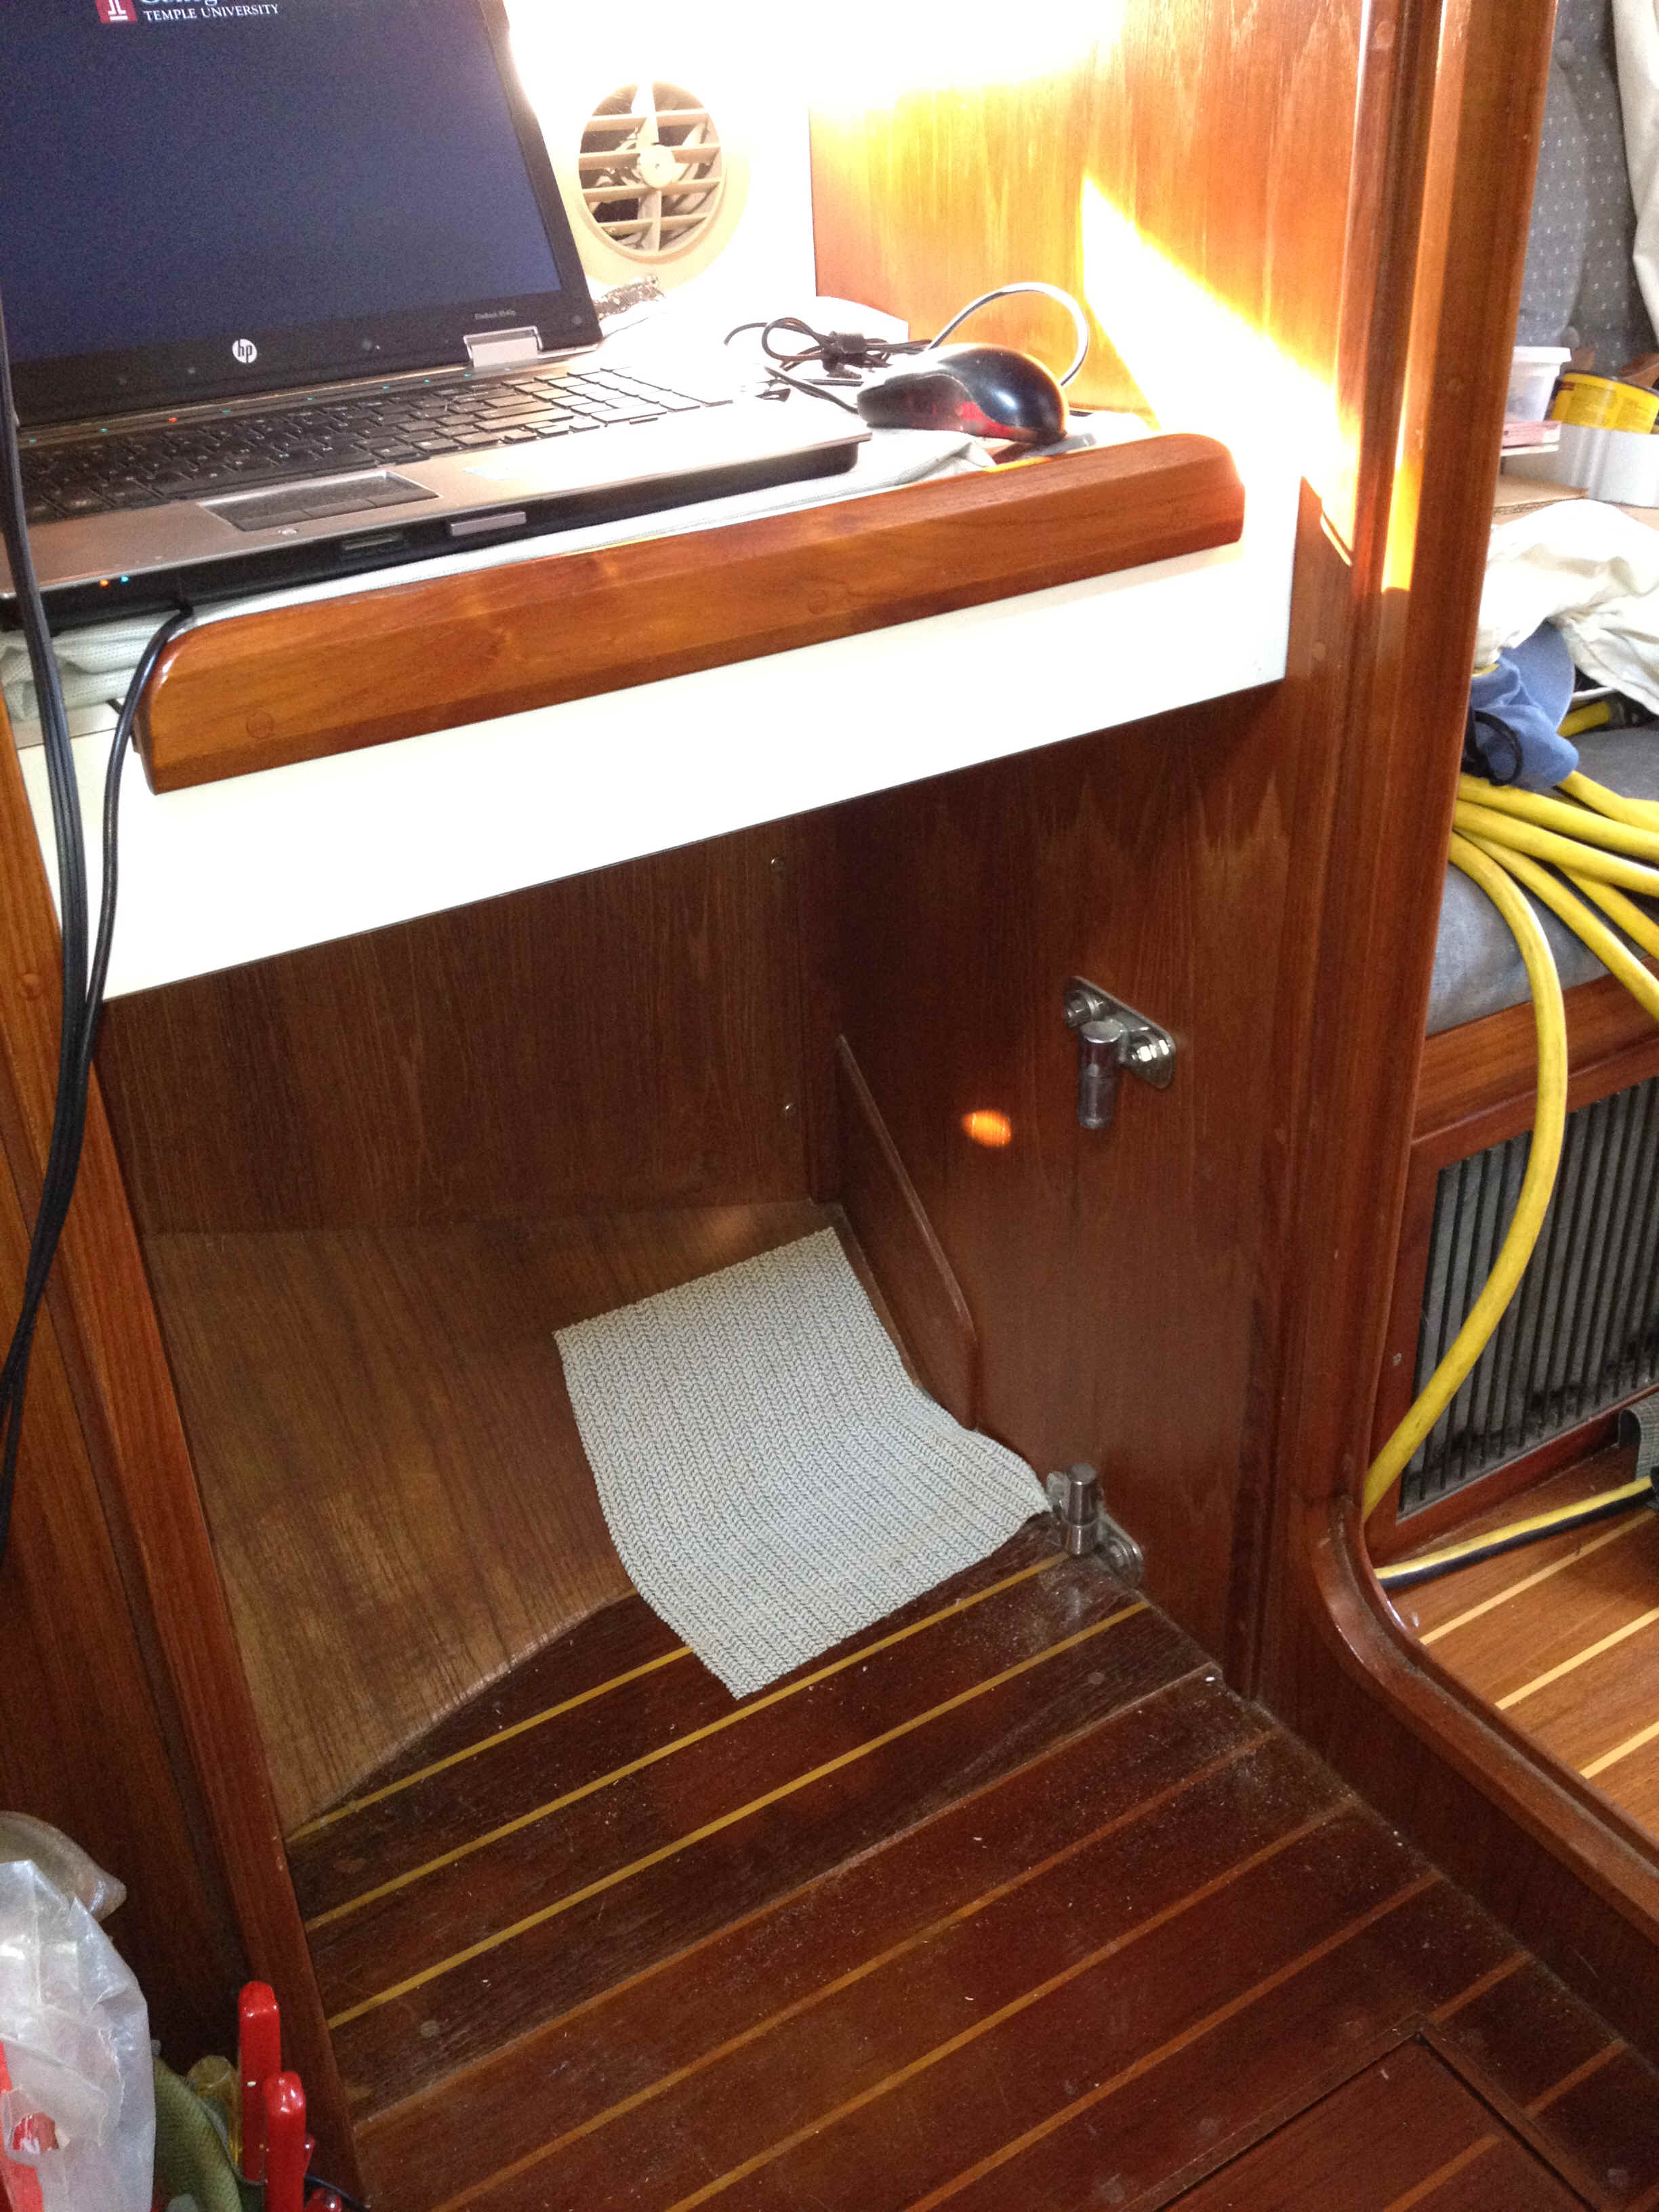
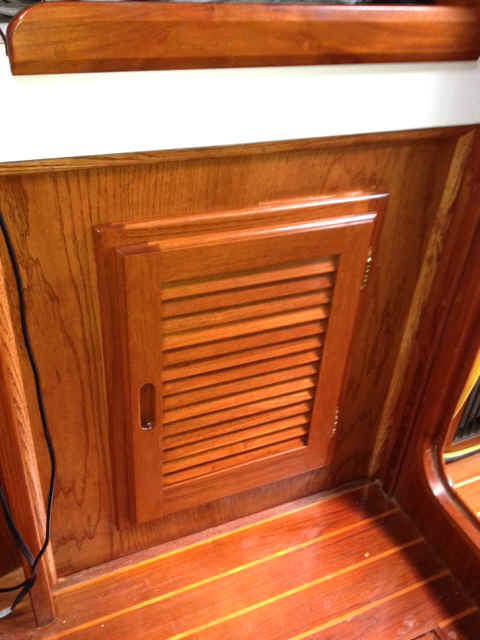
| In the above sequence of pictures one starts with the vanity as originally
constructed. Since i don't wear make-up and the stool - vanity combo were too small
for me to sit and work on my computer I decided I could live without the vanity.
After teking out the stool I left the brackets so the next owner can restore the vanity if
they choose. The third picture in the row has the new face in place. The blue tape
tells me how to get it in since the opening is not quite square. The finished
product is shown at the right. |
 |
 |
 |
 |
| In the row of pictures above, from left to right, you can see the one of
the fancy new line organizers that replaced those that were installed when the boat was
built. As Milton Friedman was known to have said, "There ain't no such thing as a
free lunch." For me the cost was surgery on the headliner of the cabin. New trim
pieces will hide the inartful surgery. |
 |
 |
In the two photos to the left you can see the completion of hiding the surgery done to
the headliner in the installation of the new, black line organizers on deck.The headliner
surgery and one of the organizers is shown above. Until I was lying on the floor
taking the picture I had never ntoiced that the longitudinal trim stringer is not on the
same line in both the main saloon and my cabin. |
 |
 |
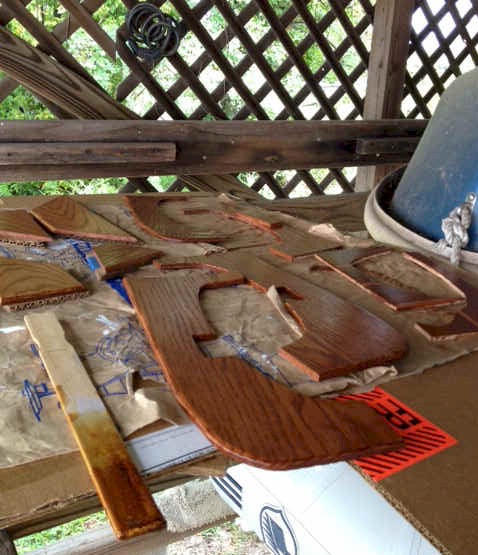 |
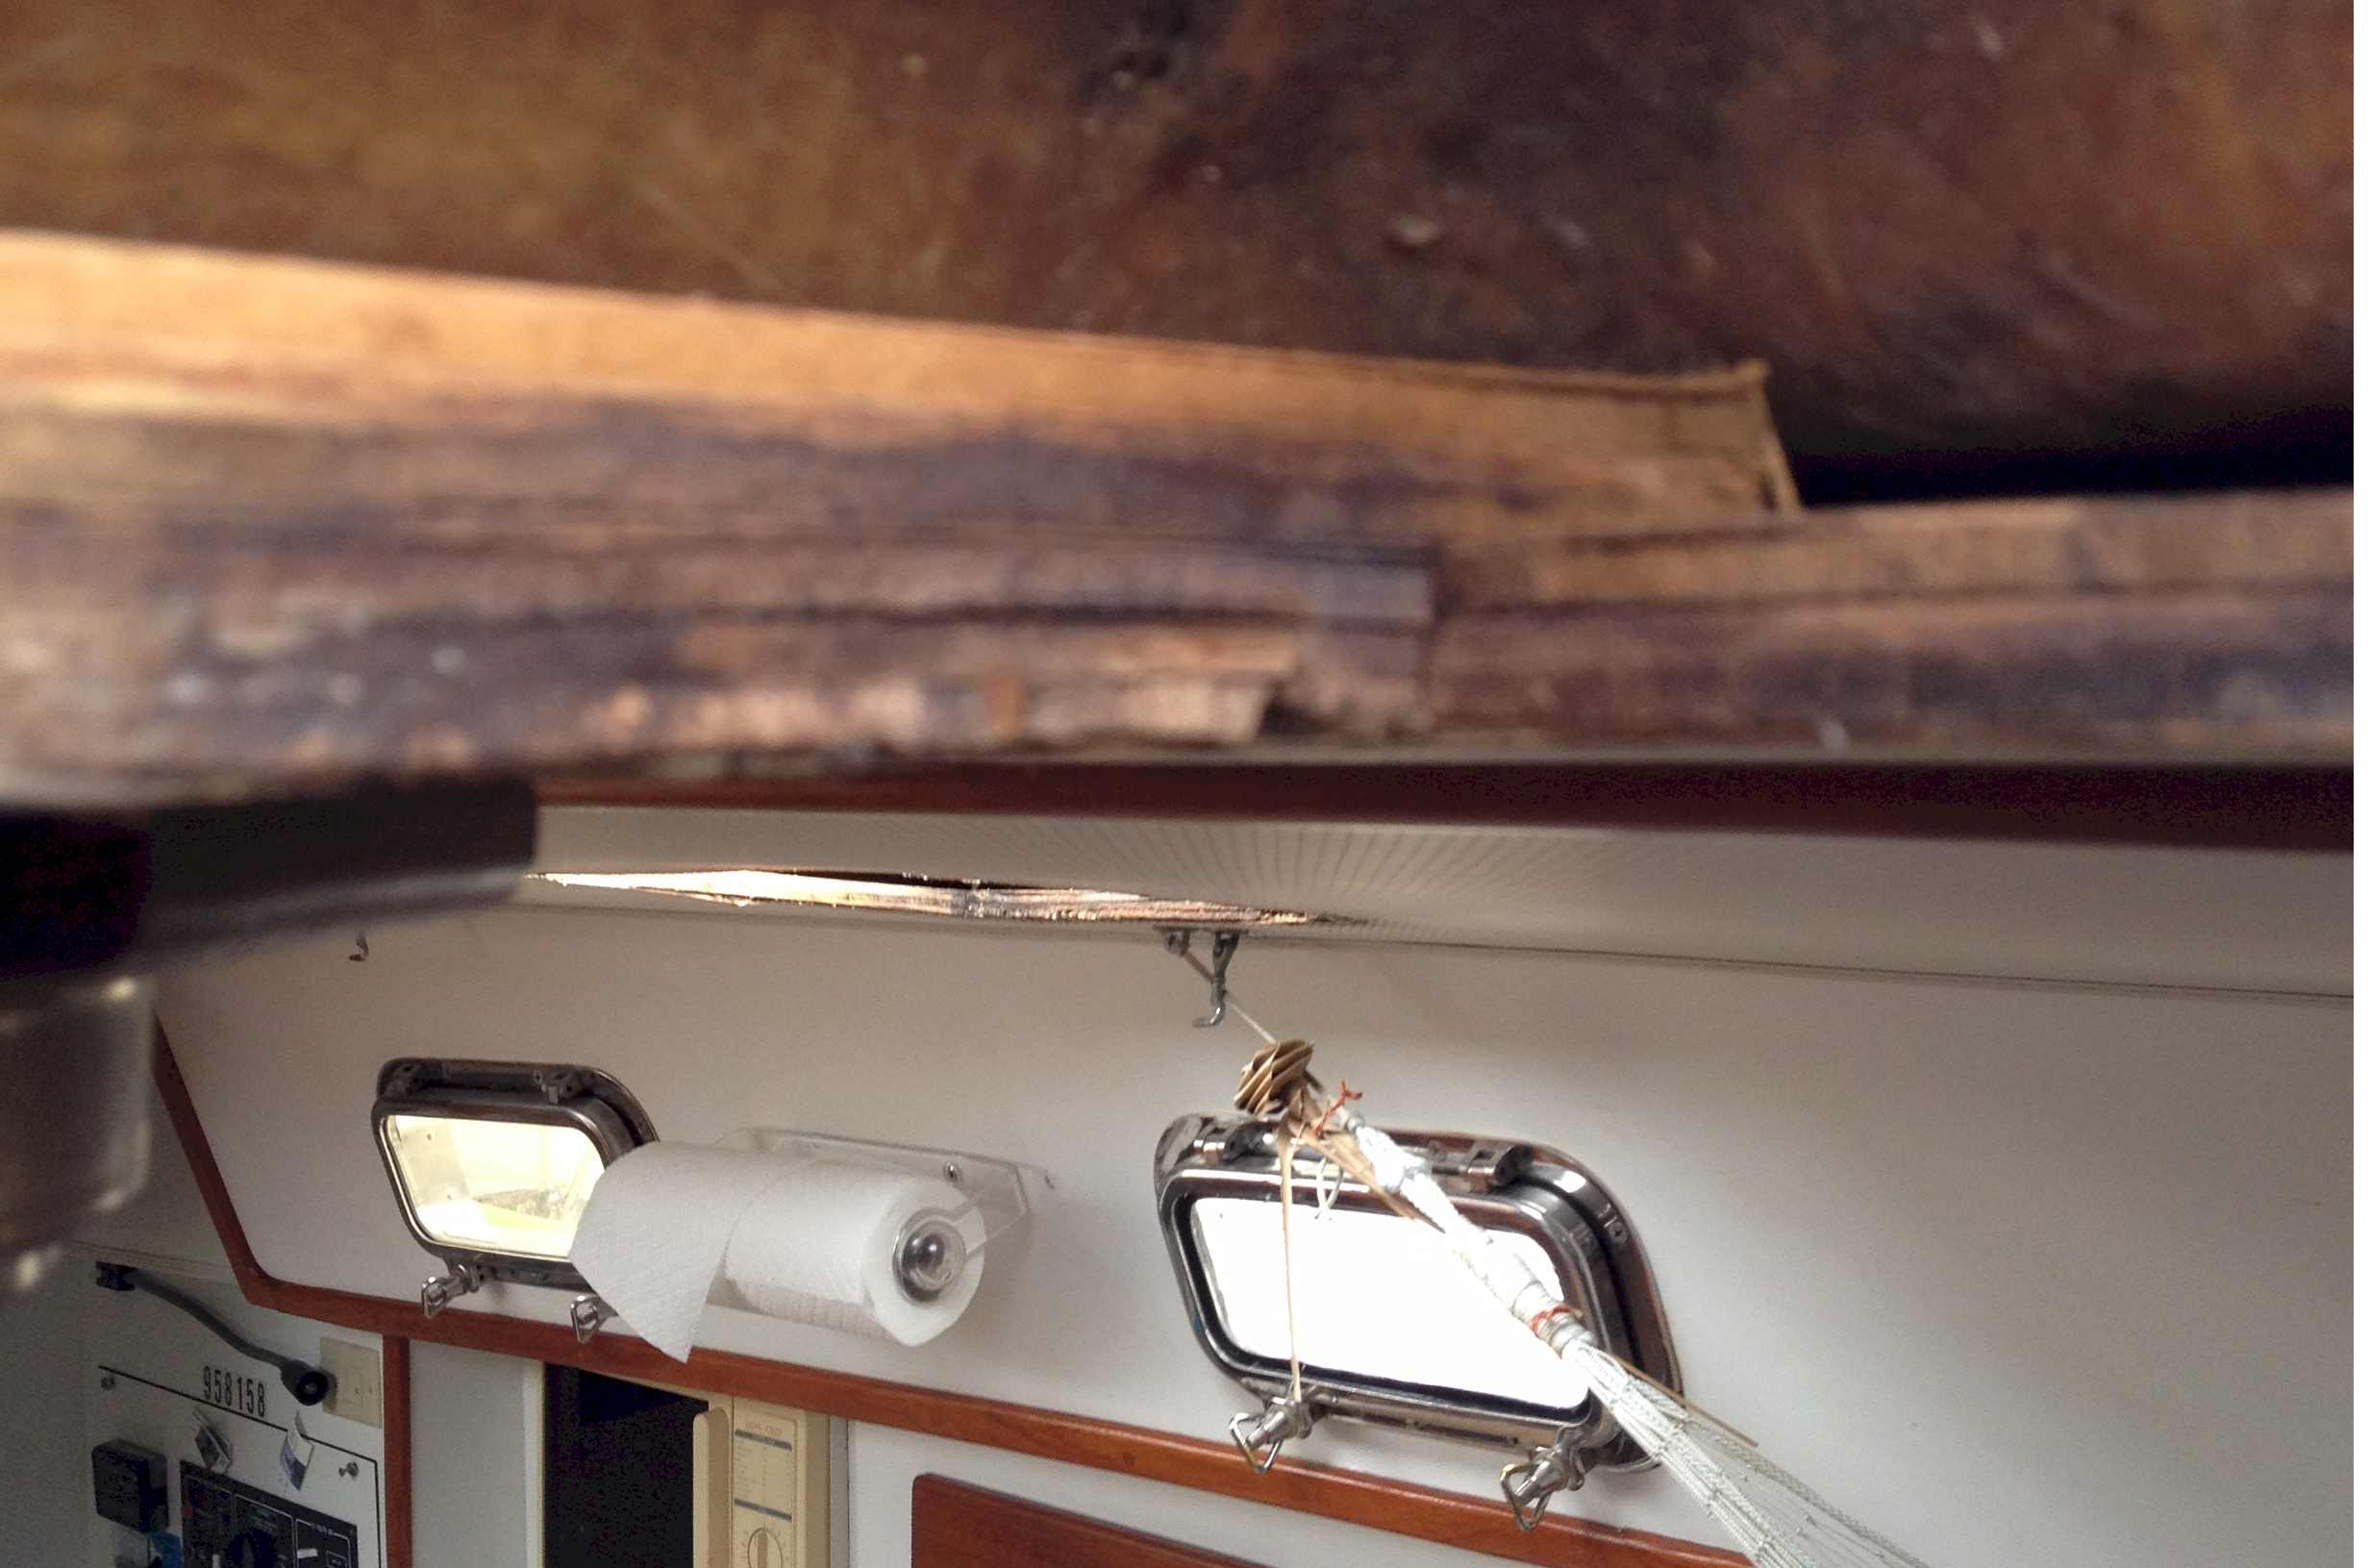
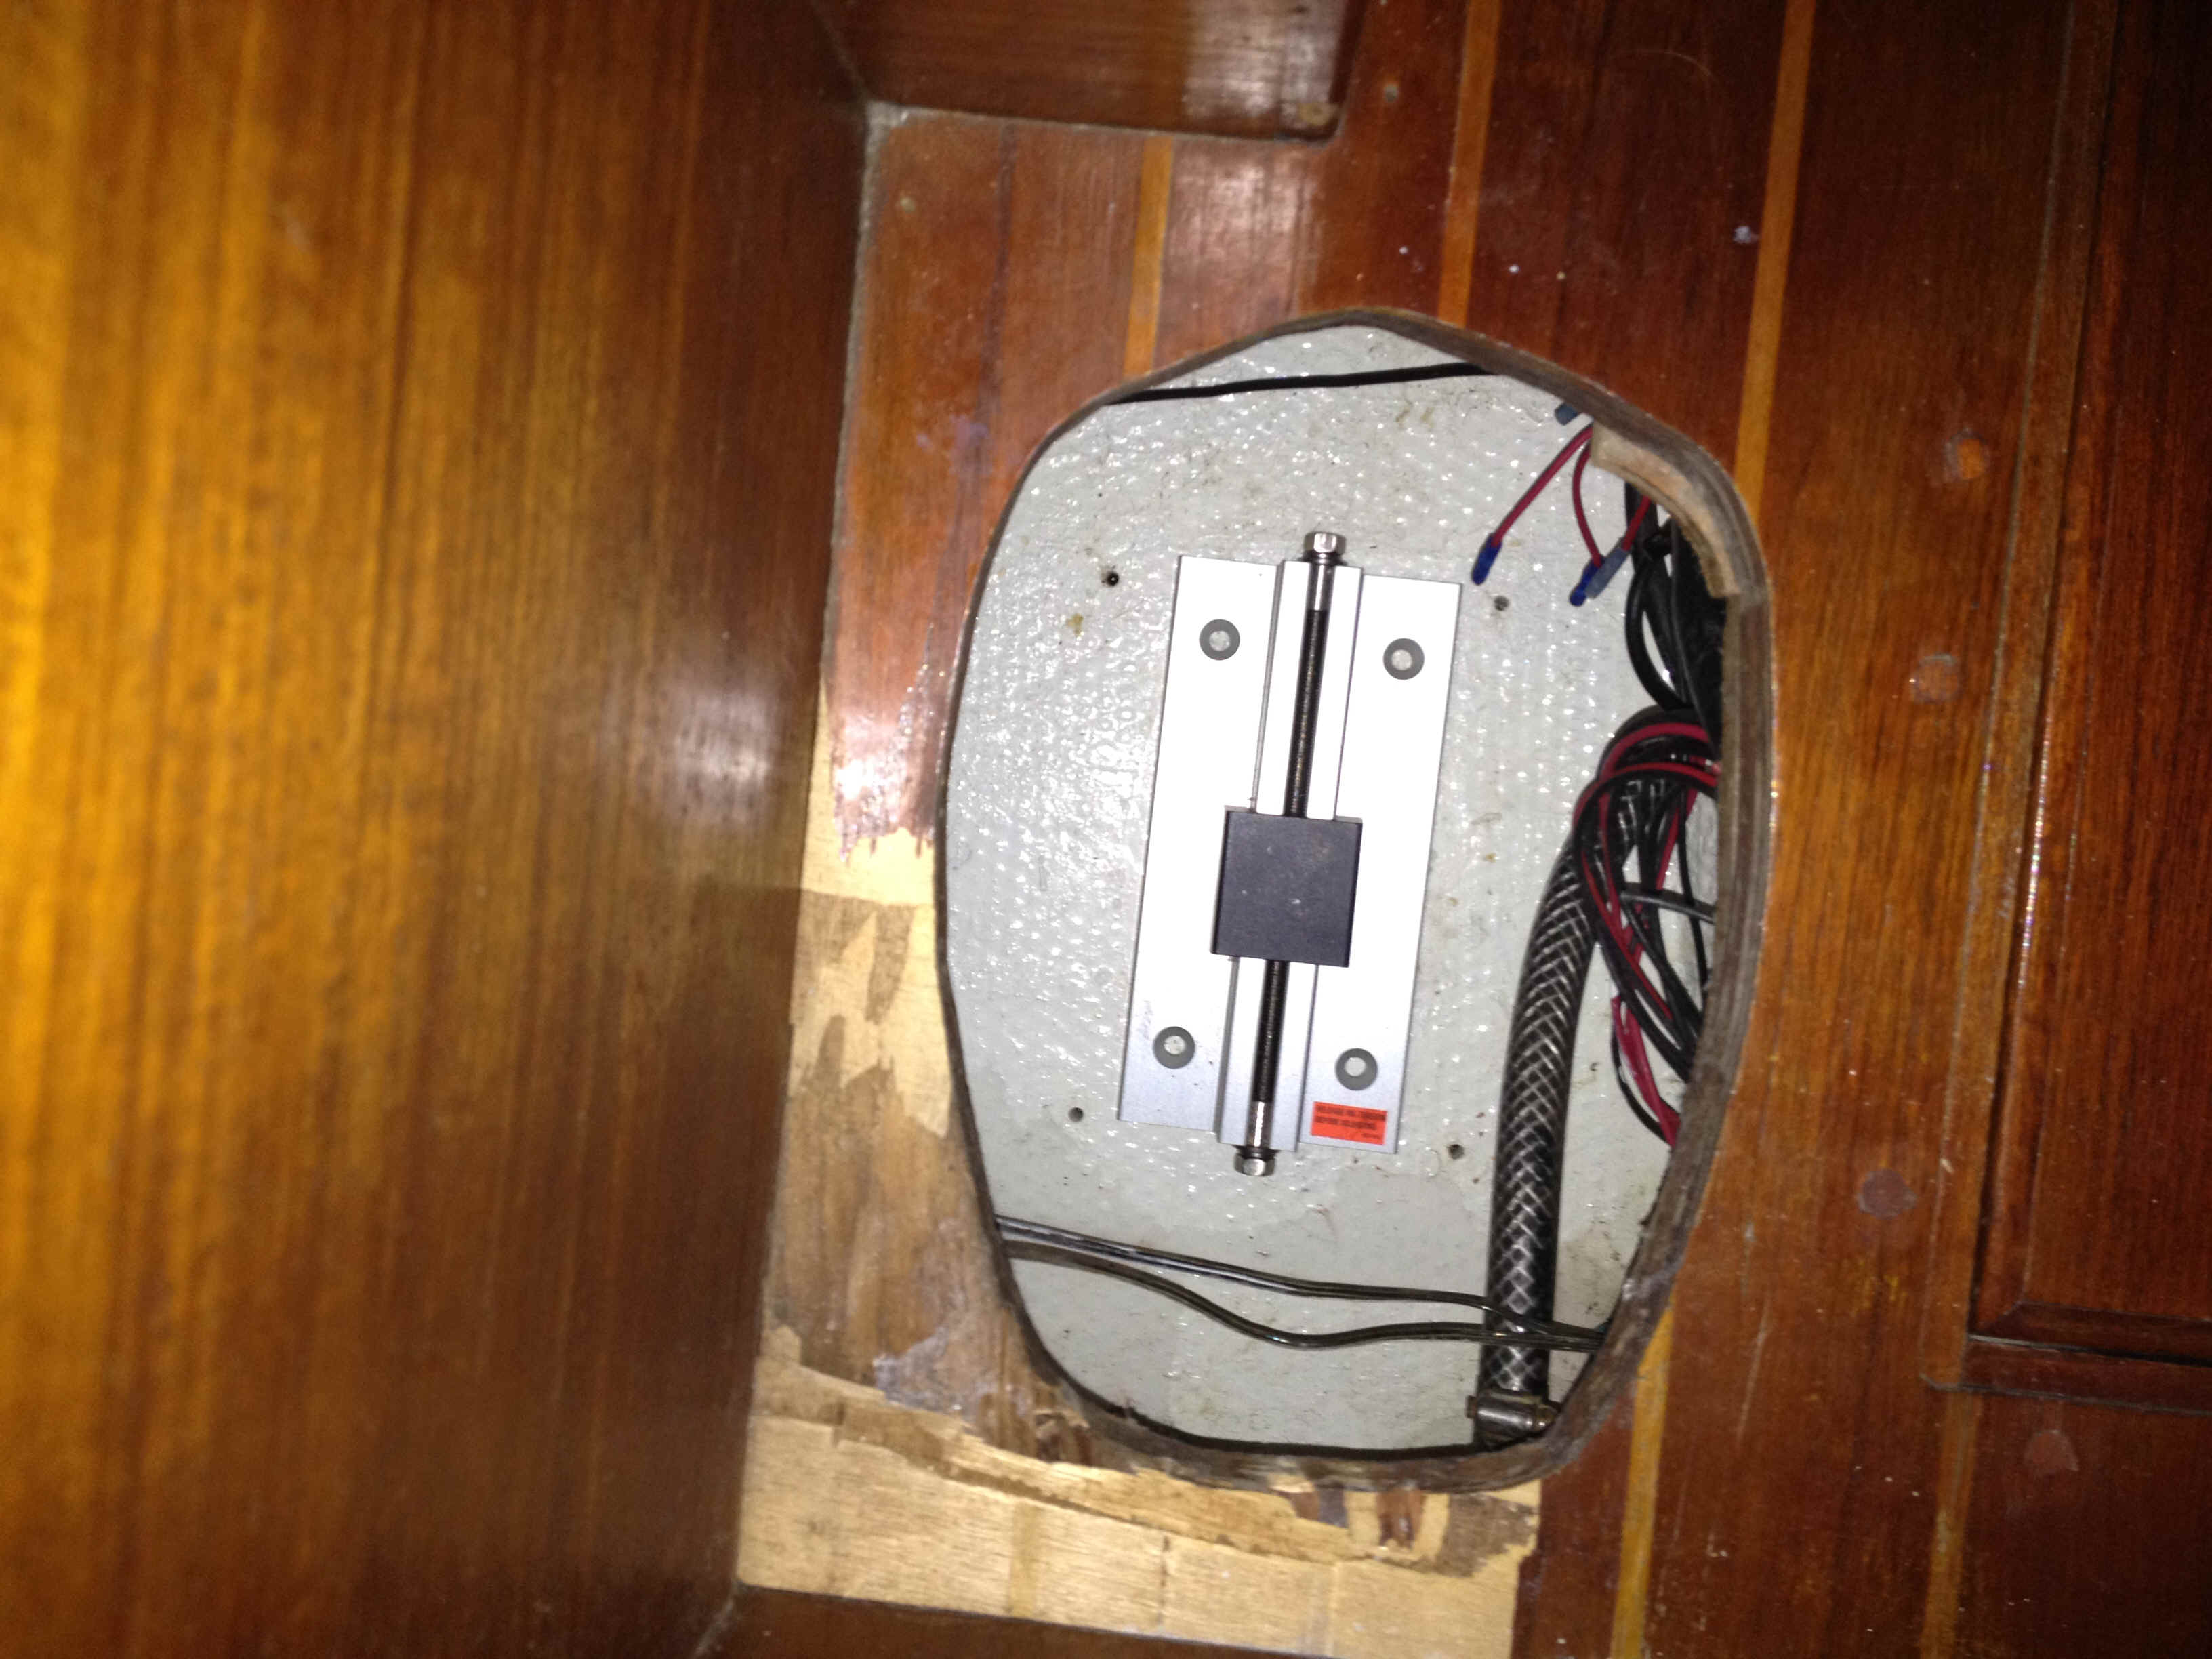
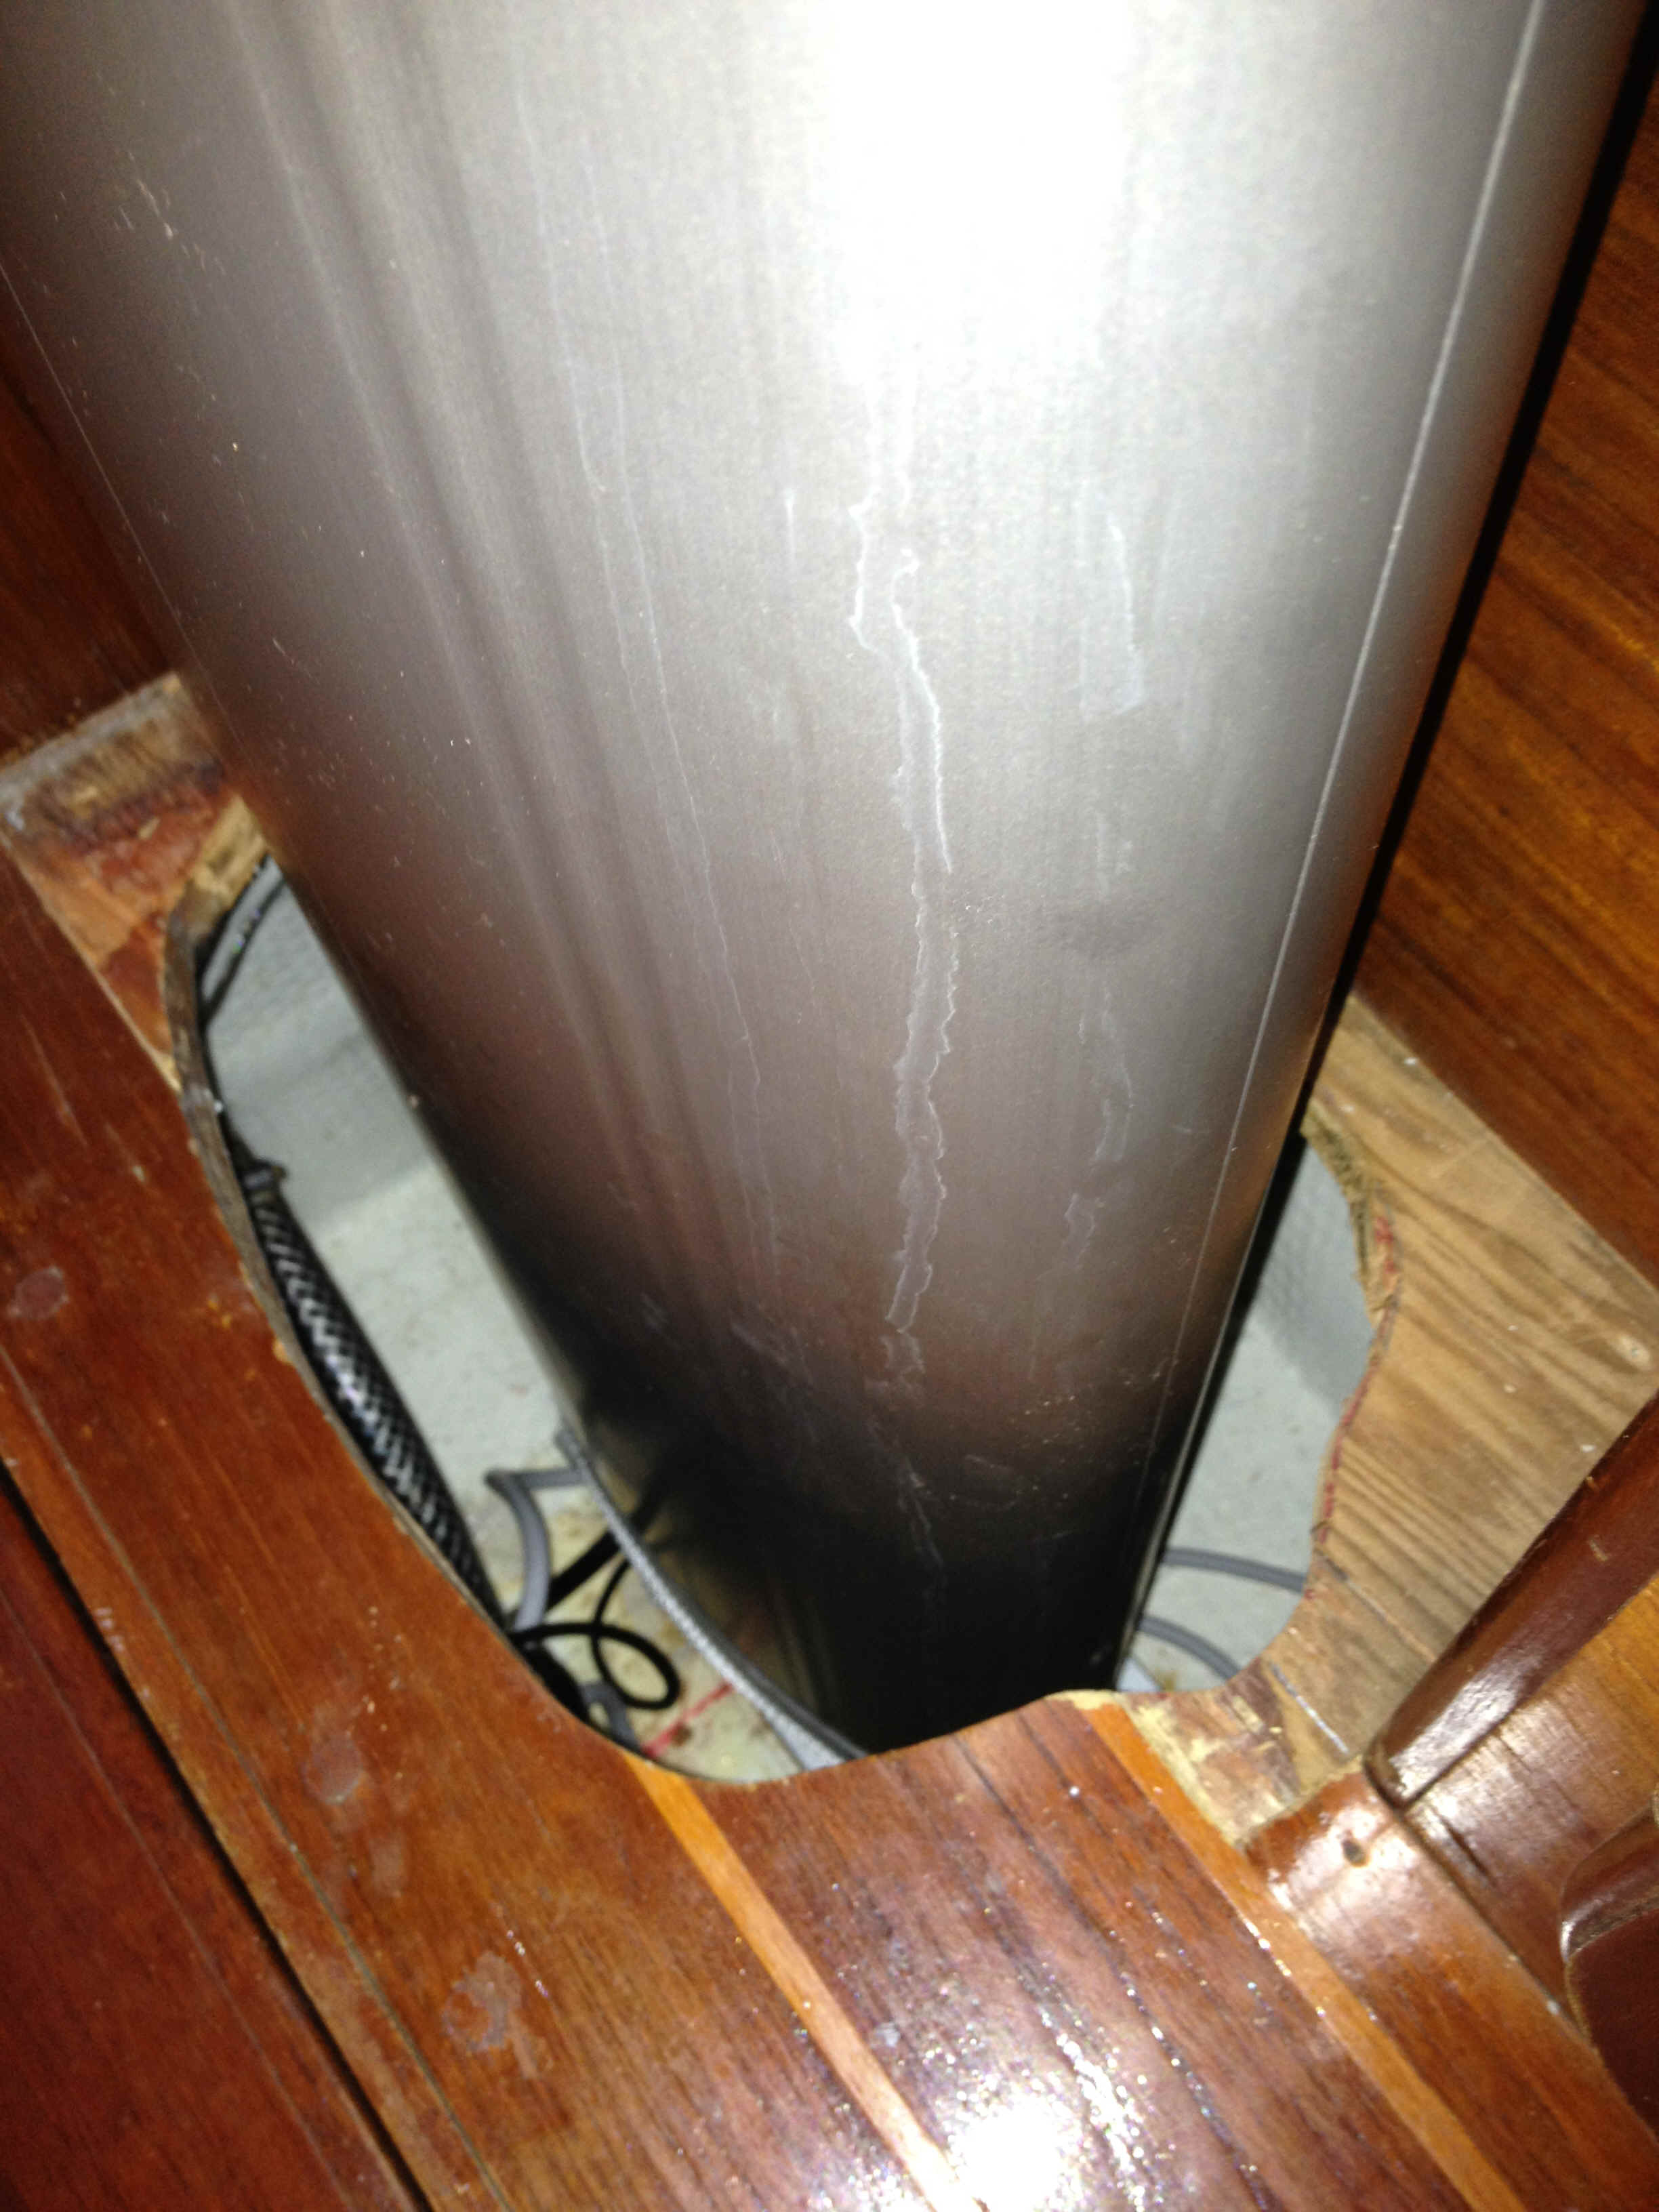
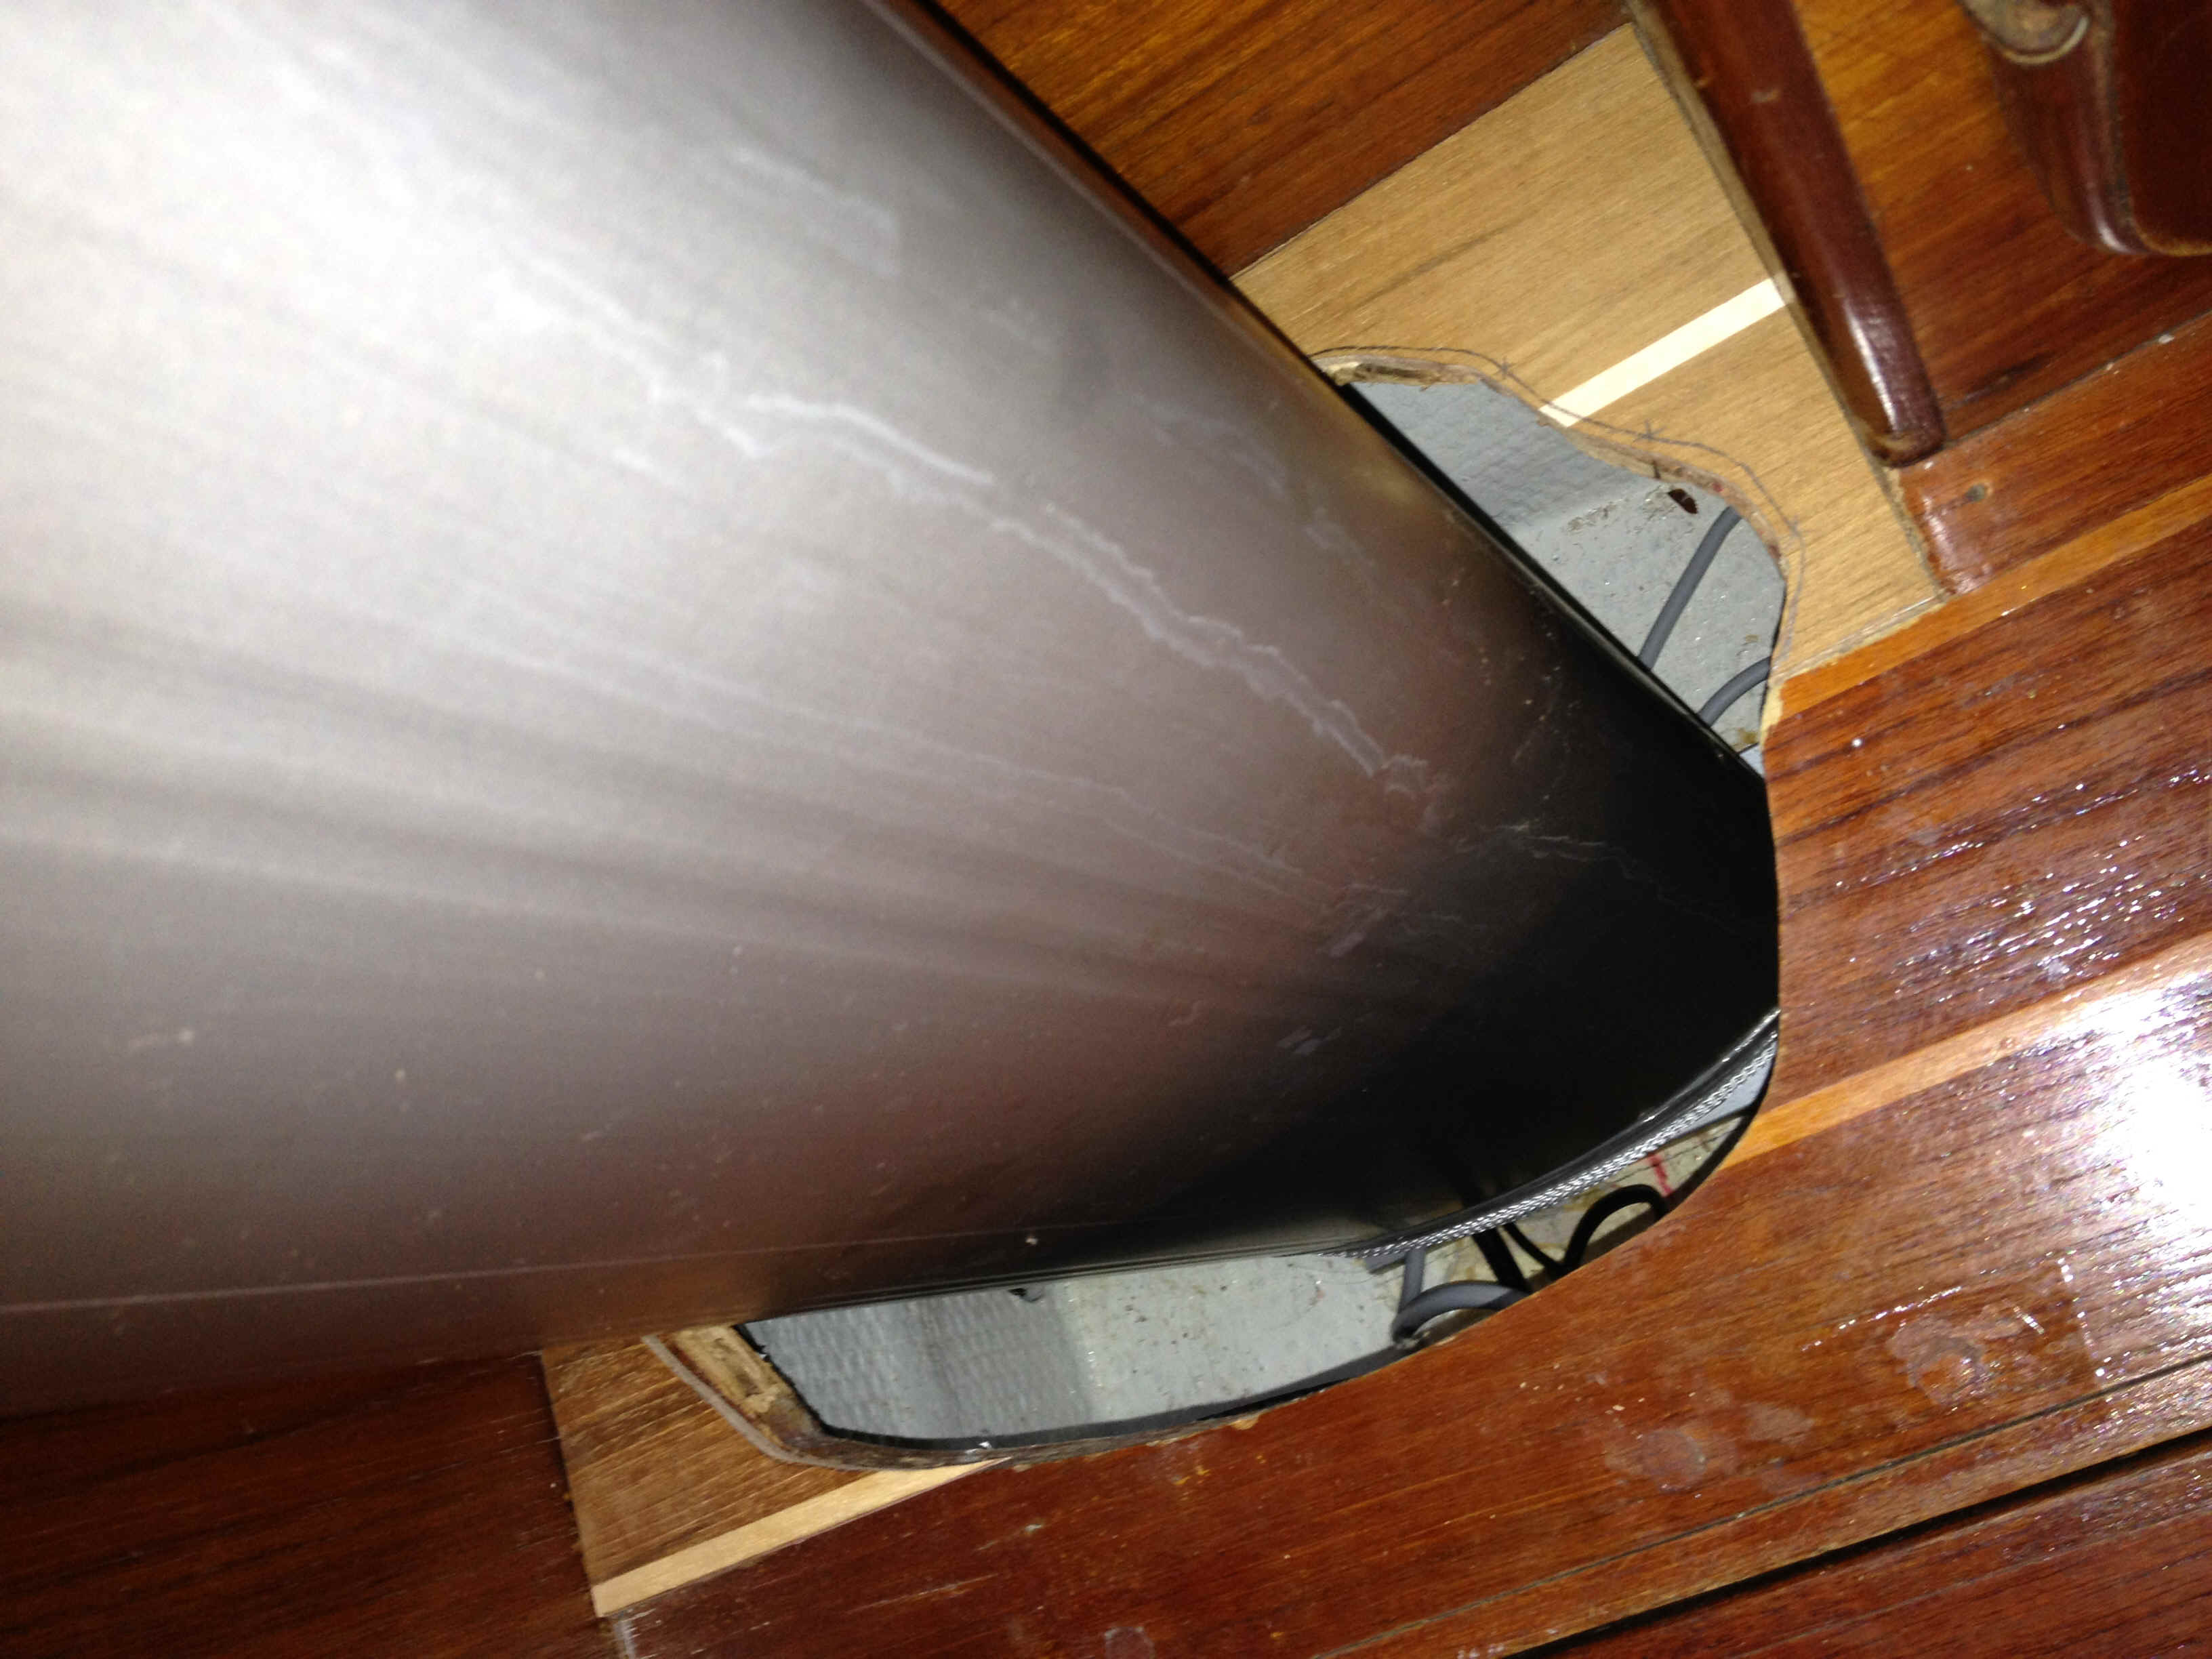
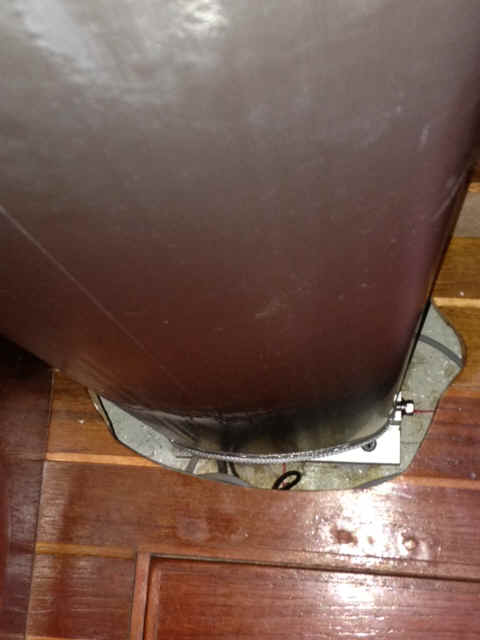
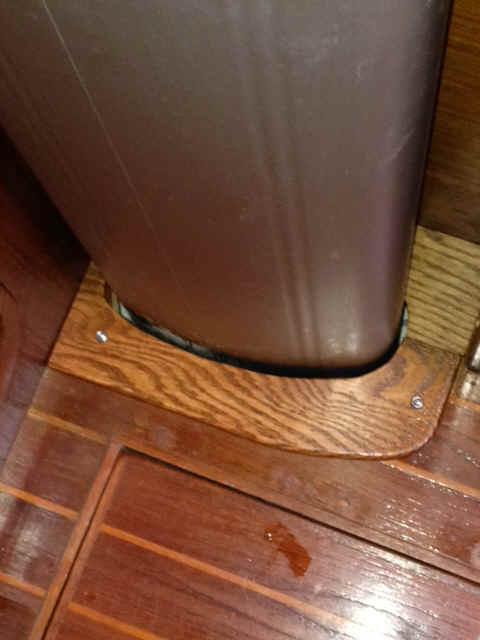
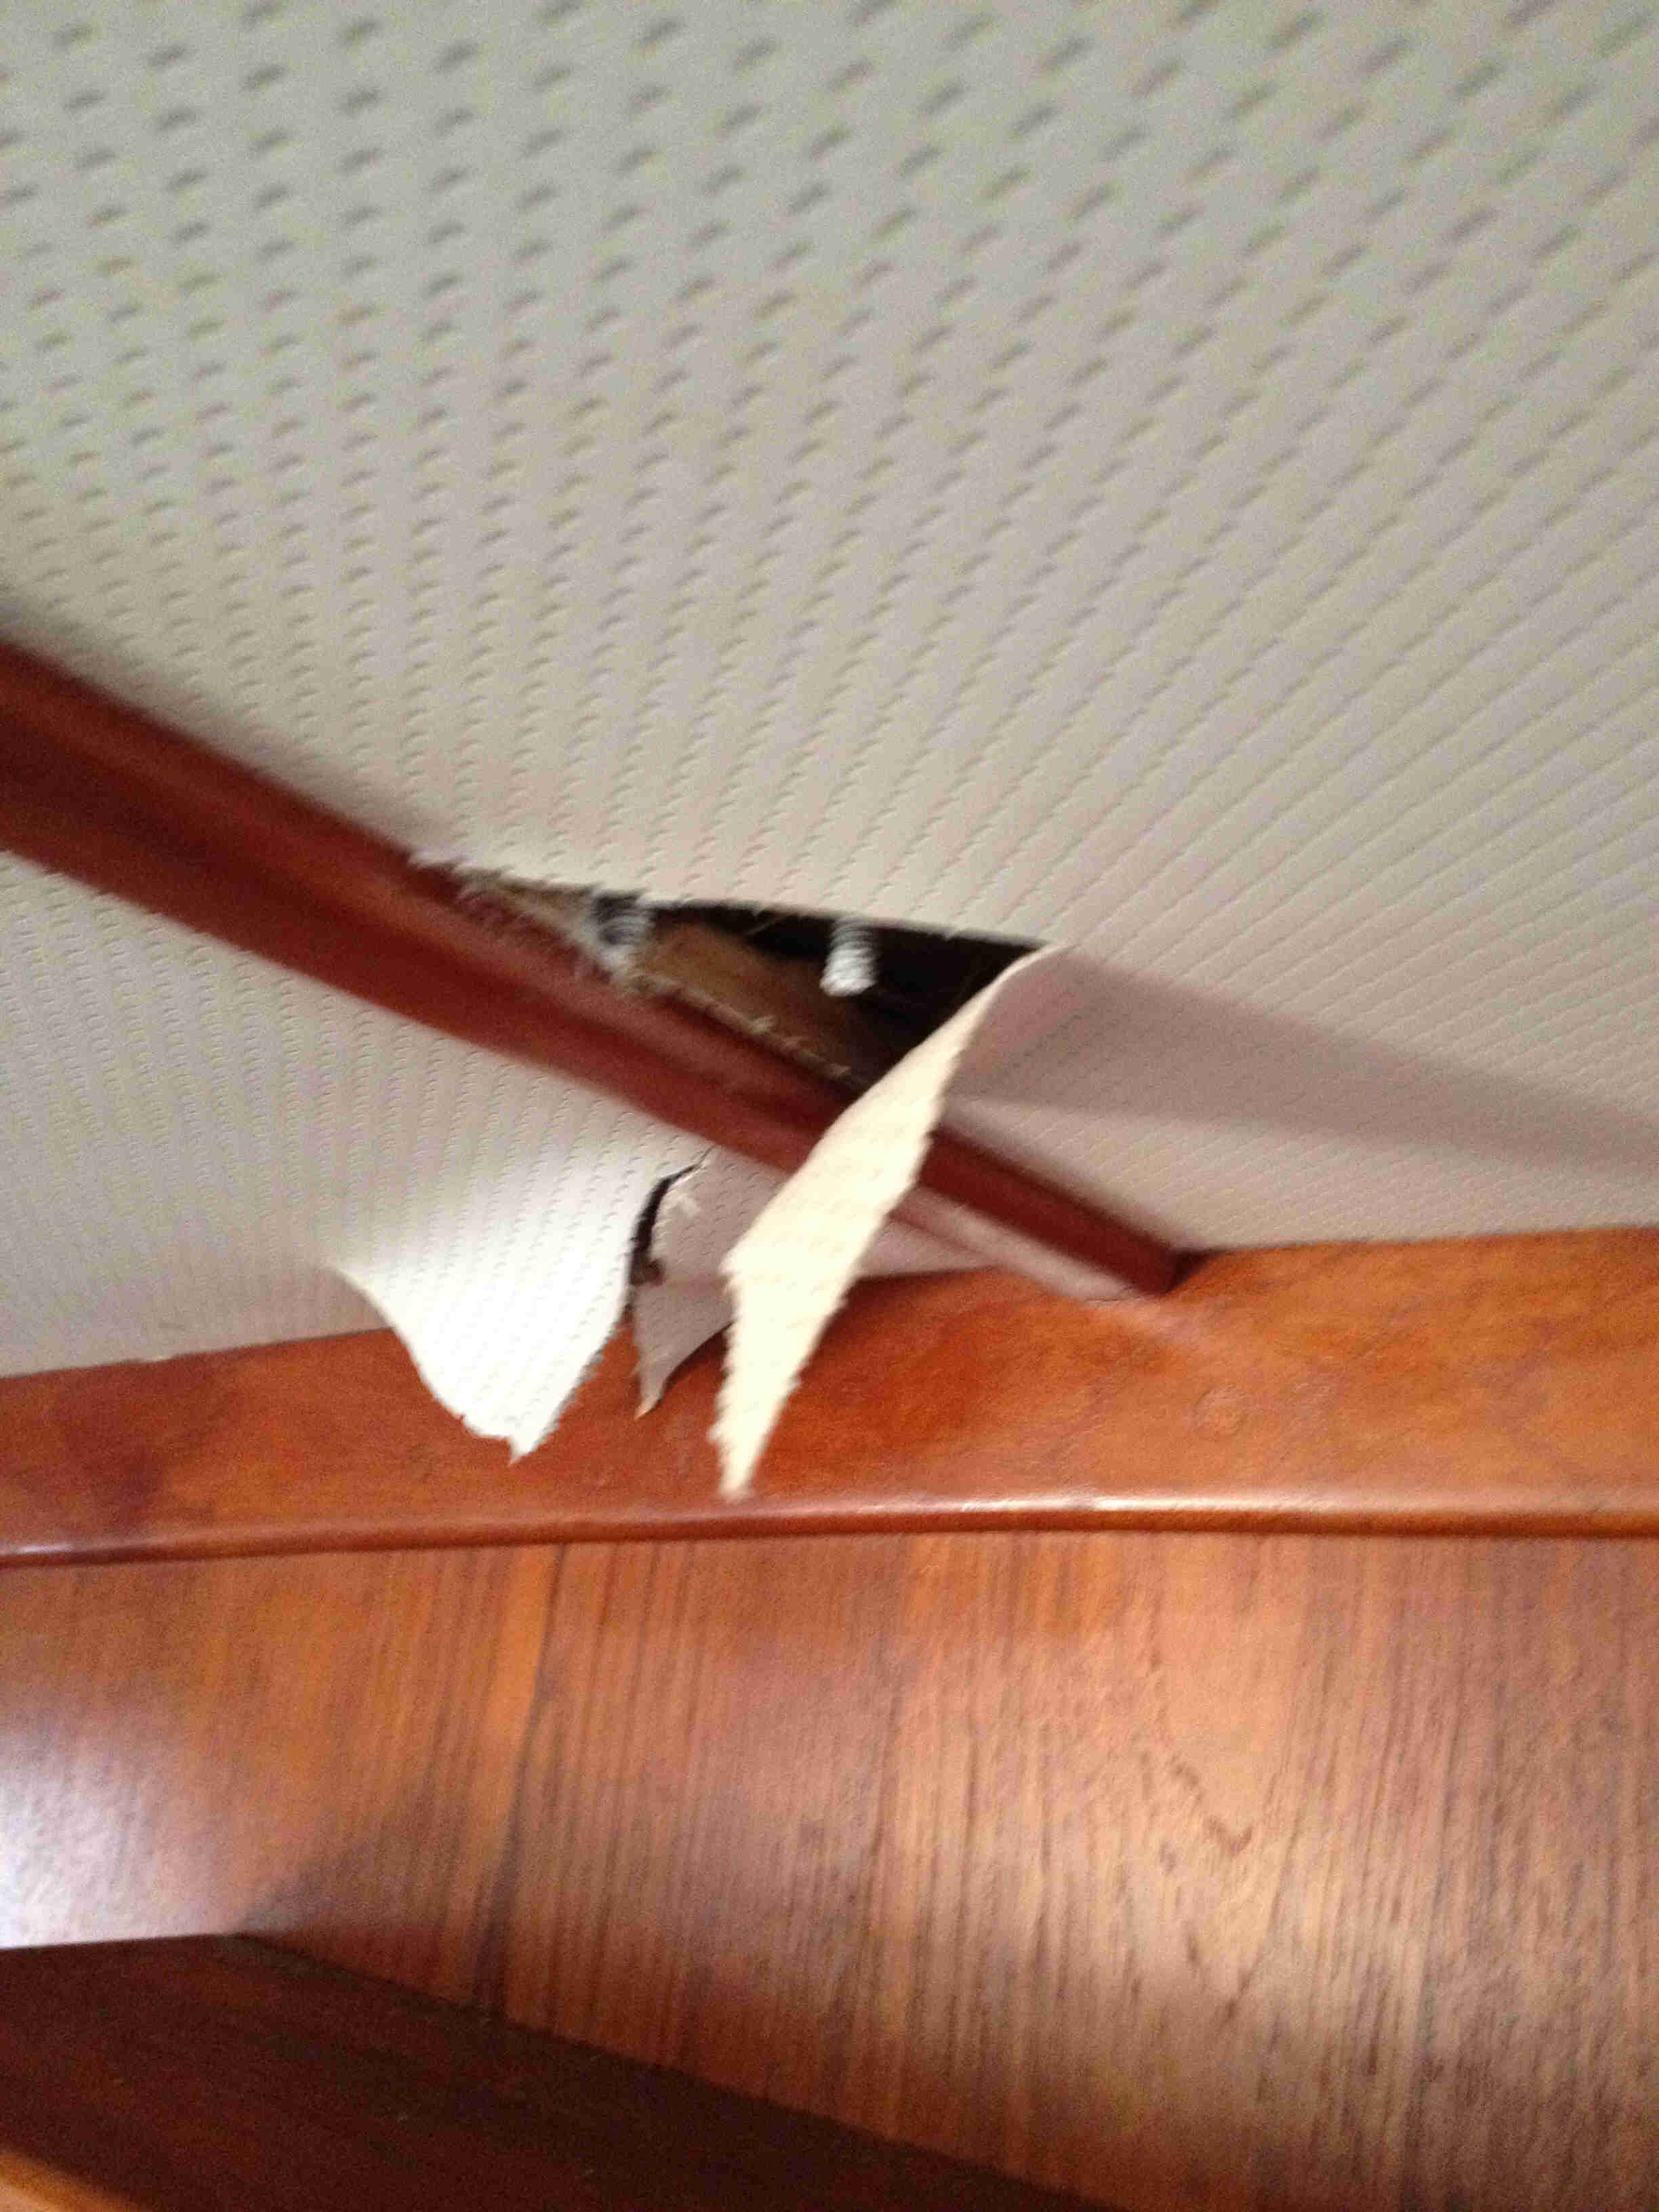
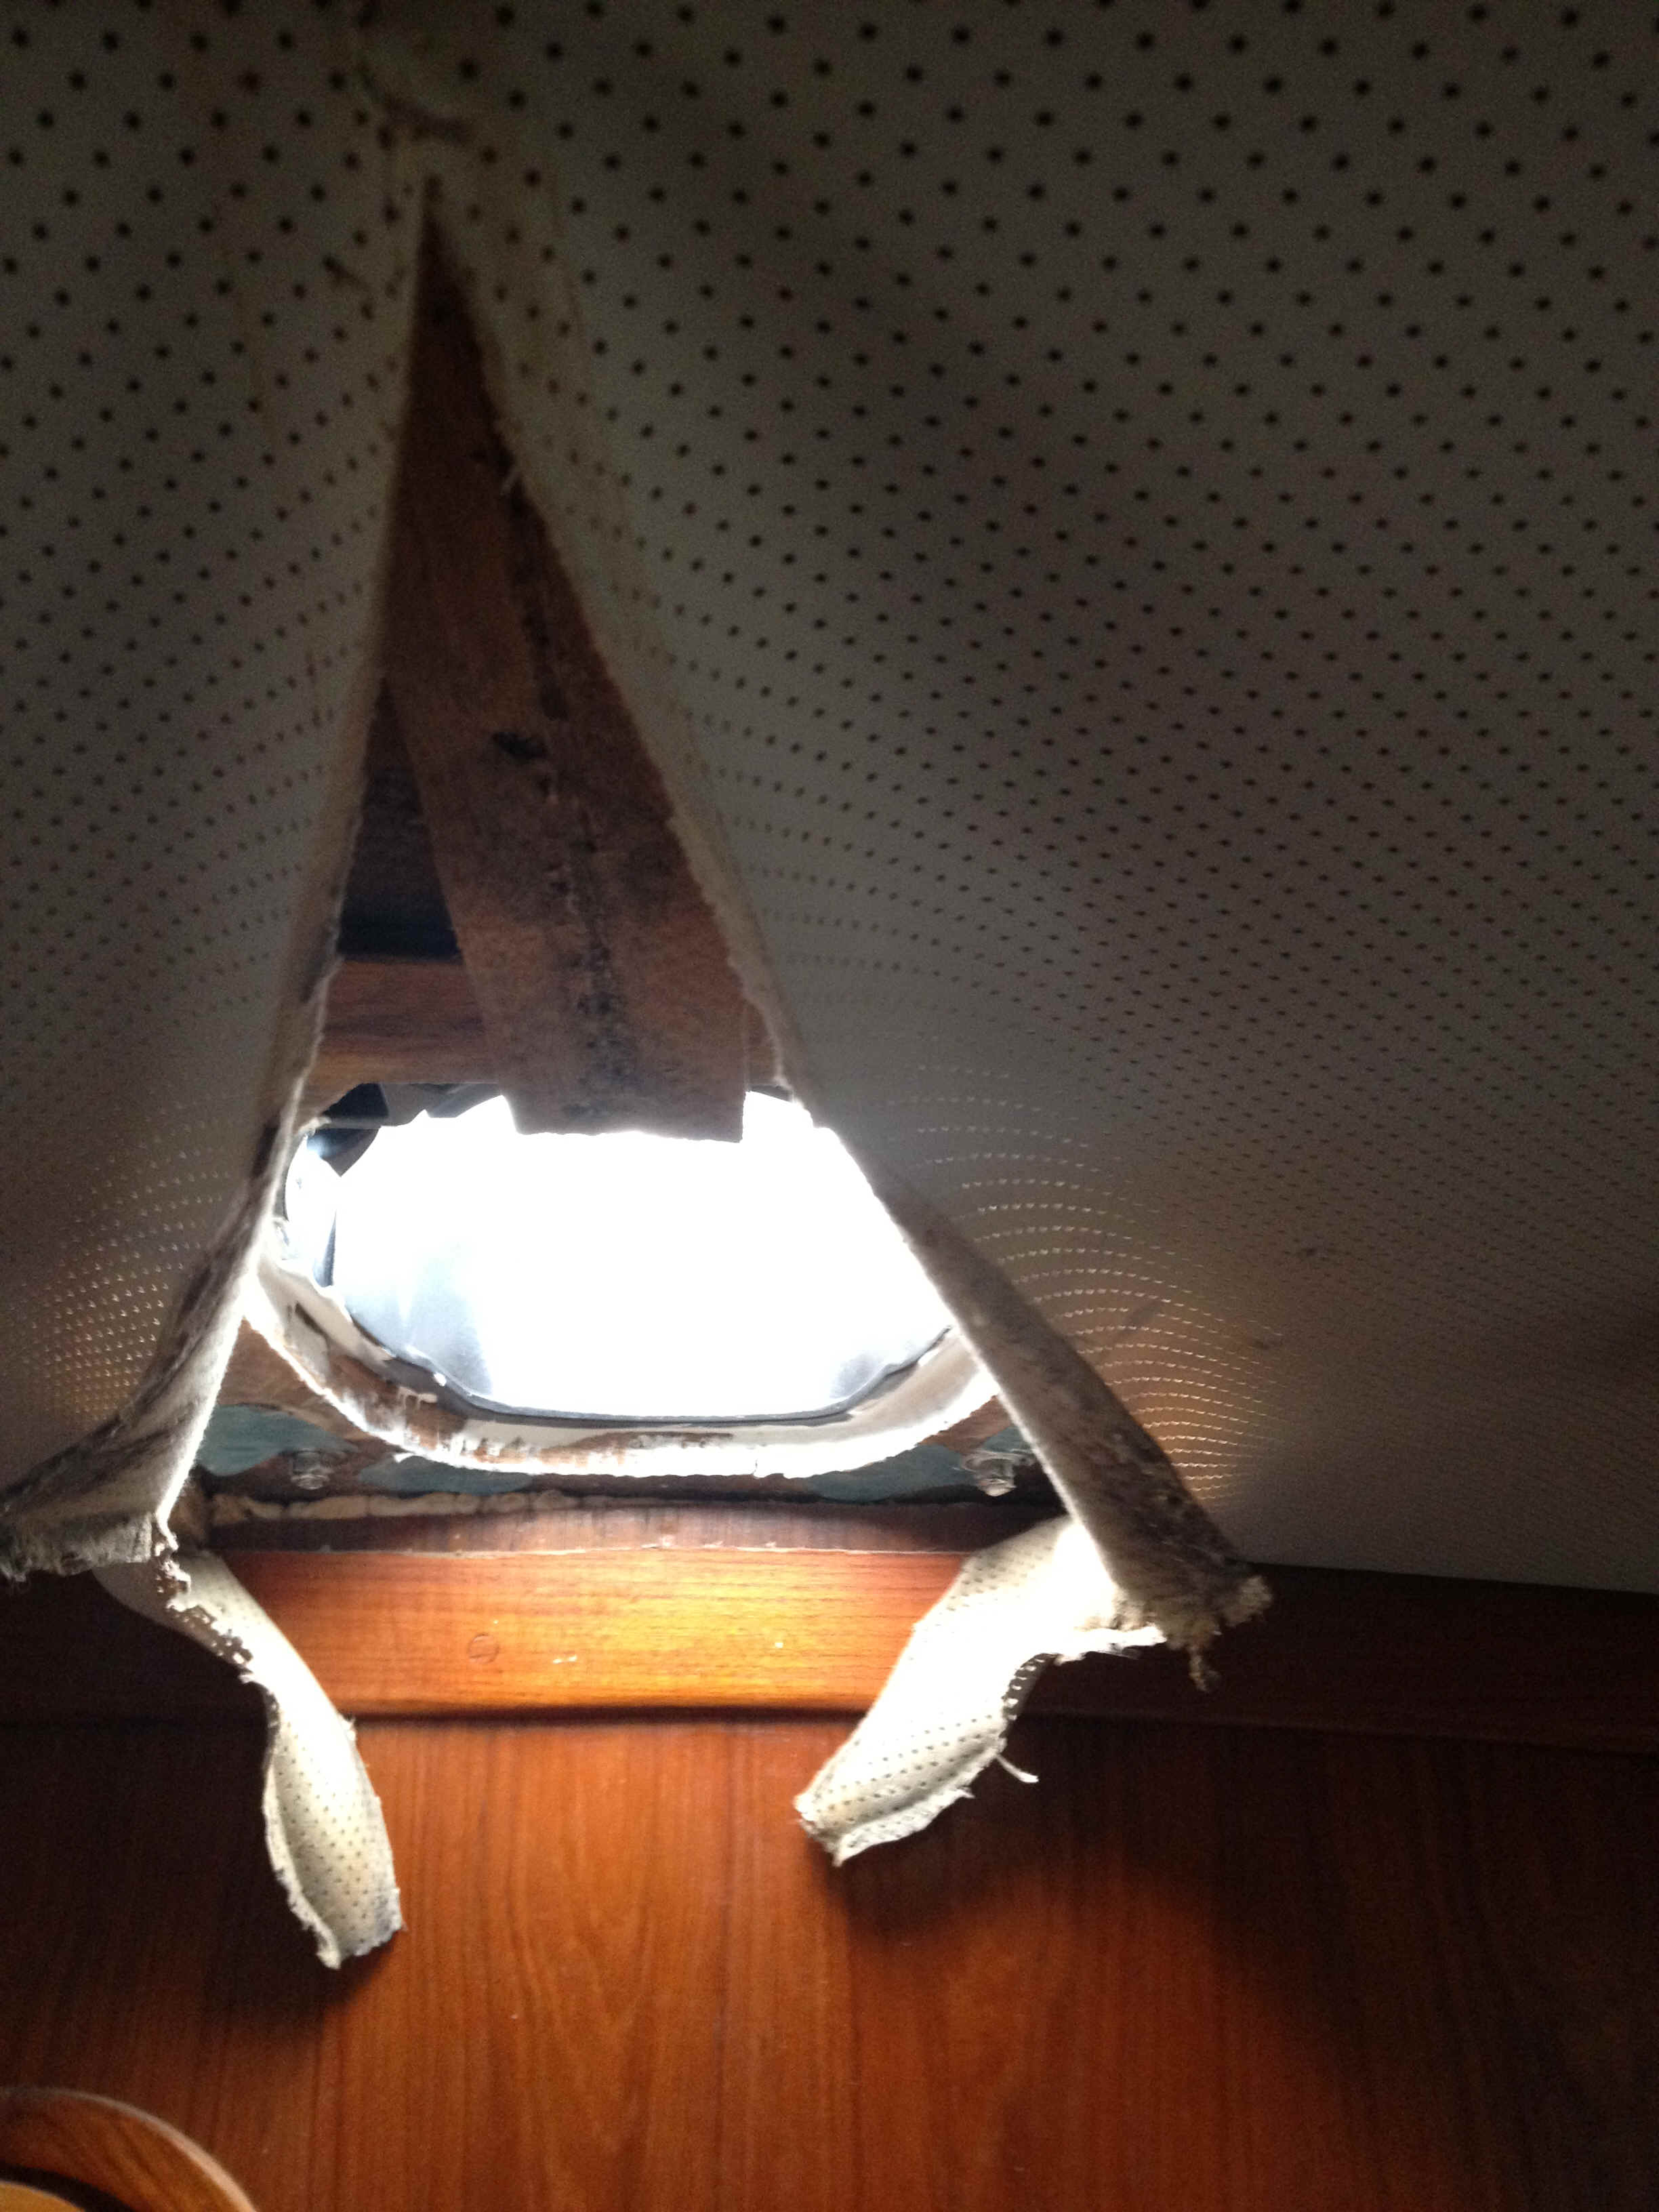
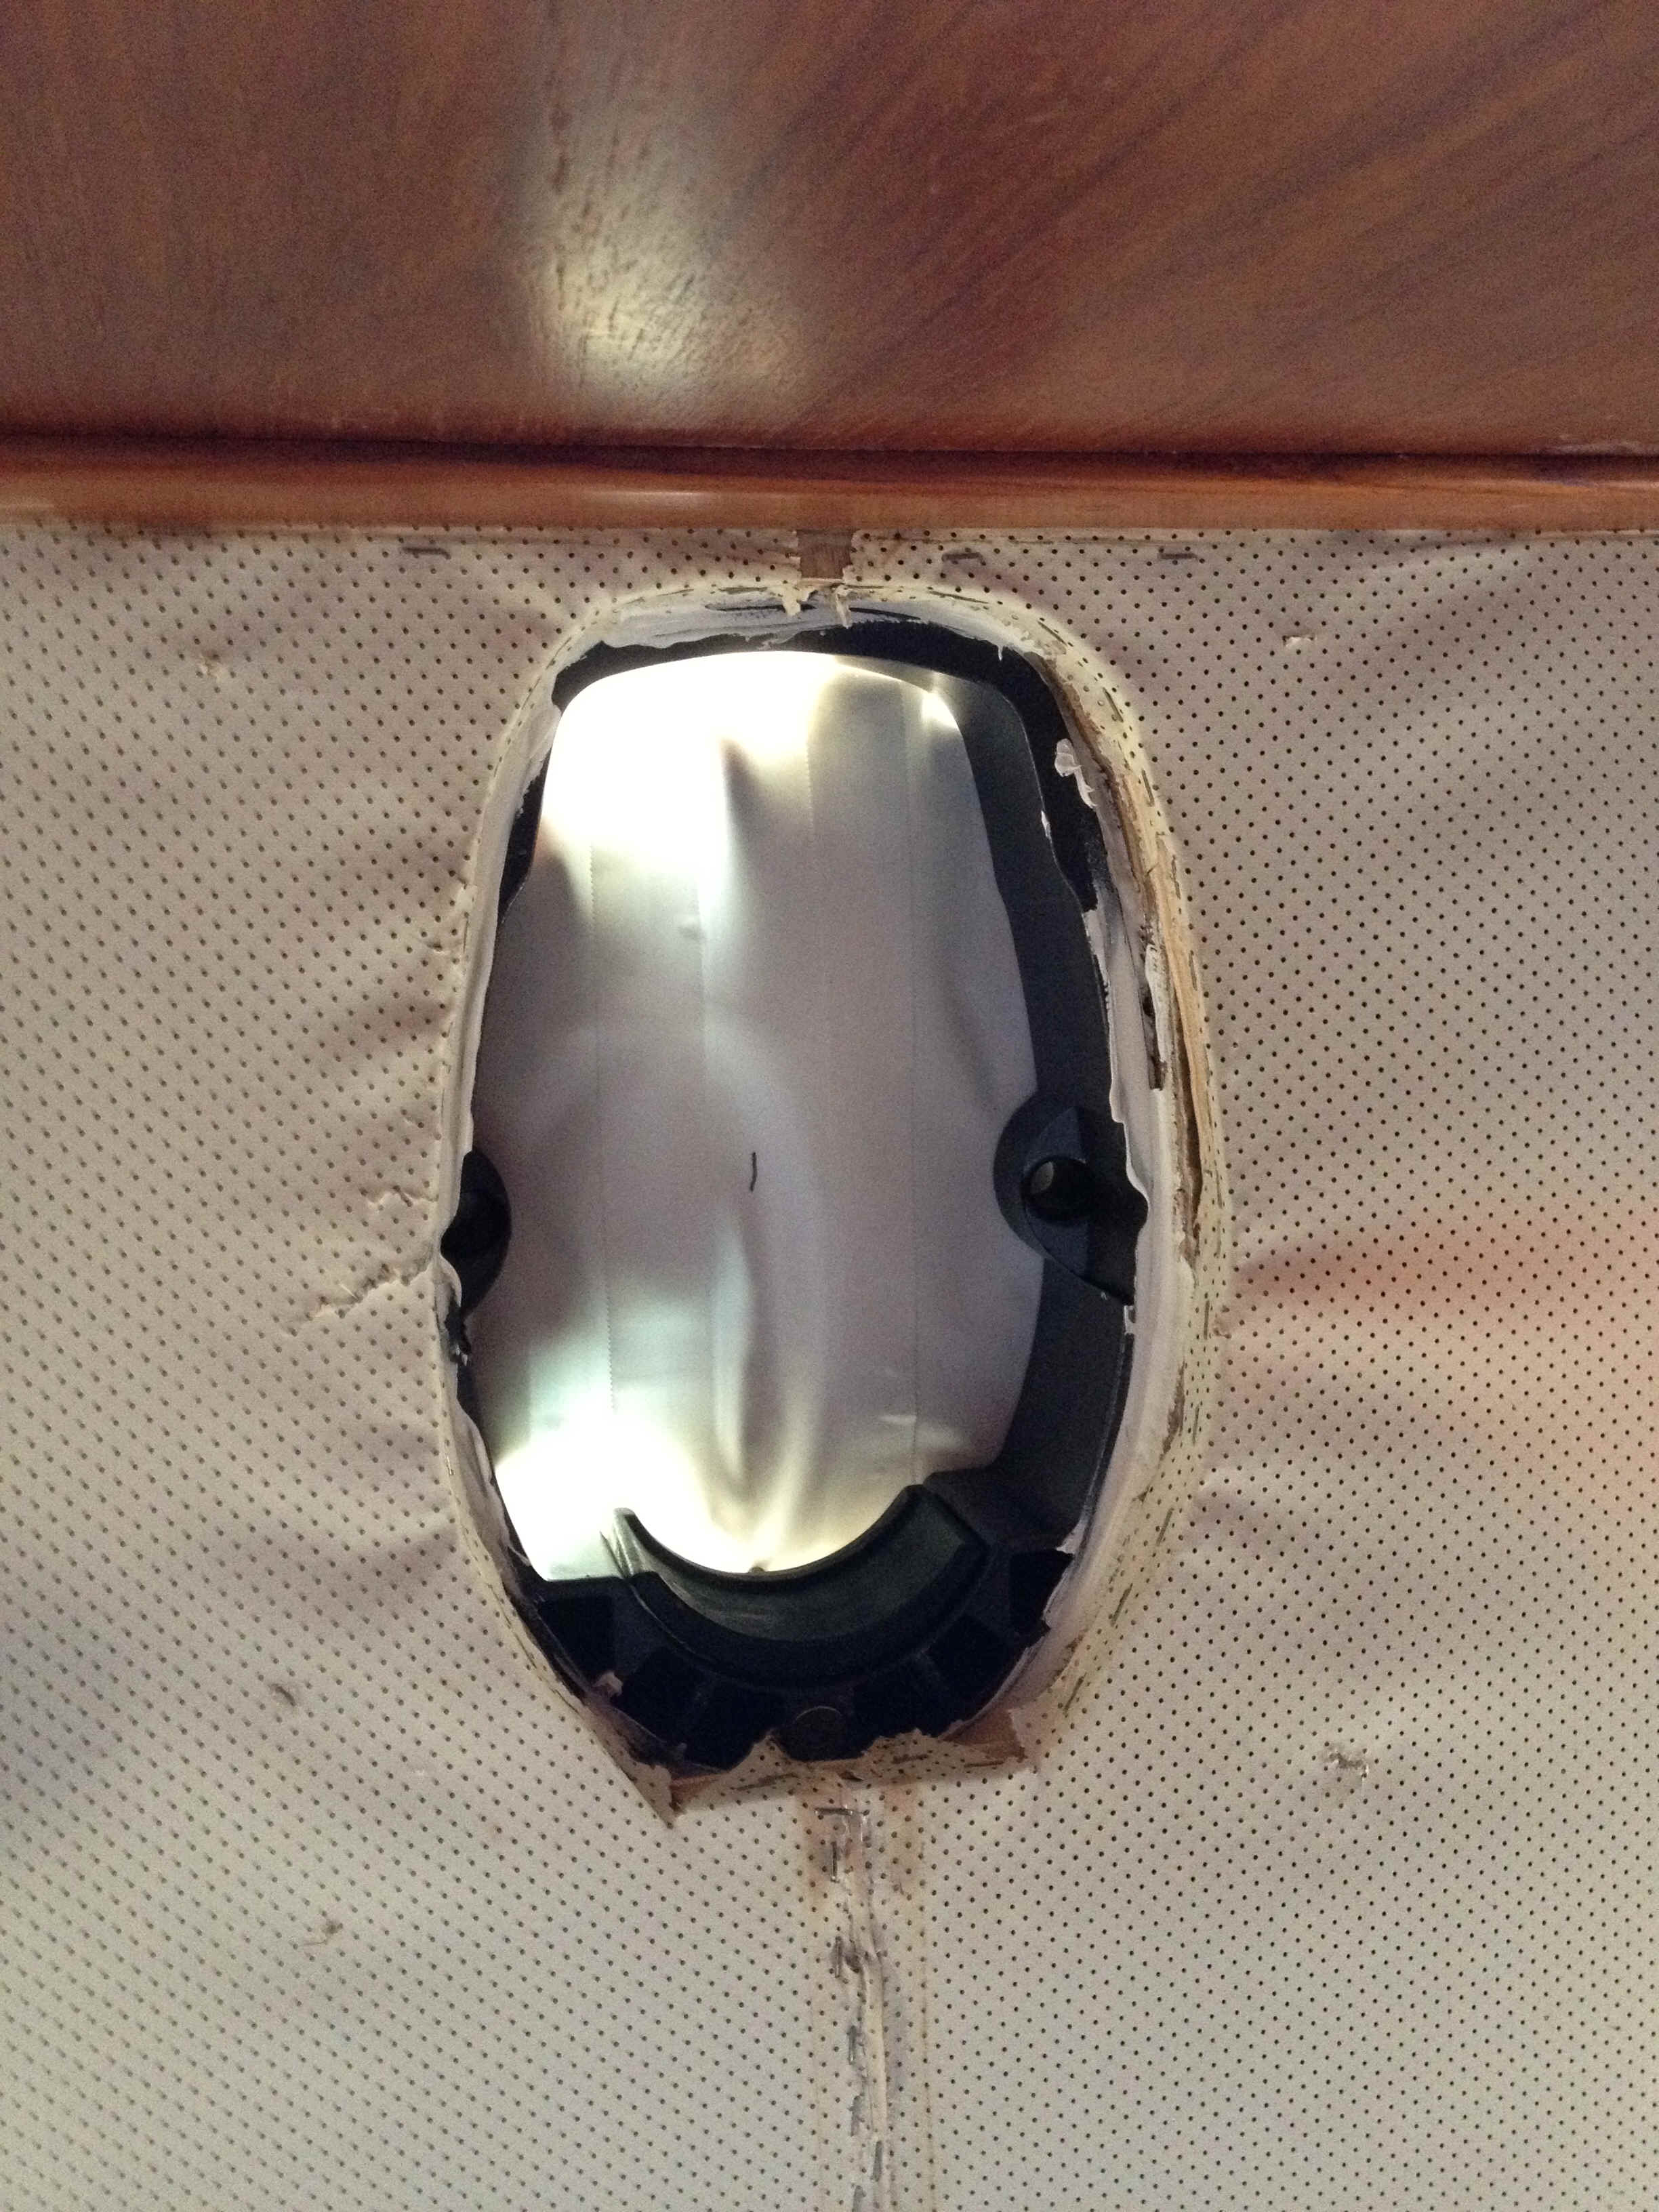
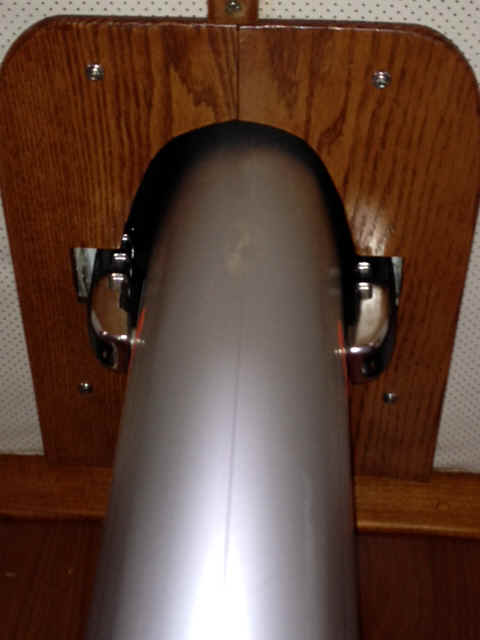
| The new mast also necessitated some surgery on the coach roof and
headliner. Since the new mast was not the same size and shape as the old one it was
necessary to install a new mast collar. To get the old collar out we had to do surgery on
the surrounding headliner. The new mast collar required cutting a bigger hole
through the cabin top and also meant making a new backer board between the coach roof and
the headliner. Of course, since getting hands inside the headliner meant stretching the
fabric some, so when it was restapled to the new and differently shaped hole there was
some puckering. To give the whole thing a more finished look it was necessary to make some
trim pieces. The trim pieces are shown in the above row at the far right in my
'paint shed,' which is actually a covered dinghy rack. The trim that now hides where the
entry of the mast through the cabin ceiling is at the right. |
 |
 |
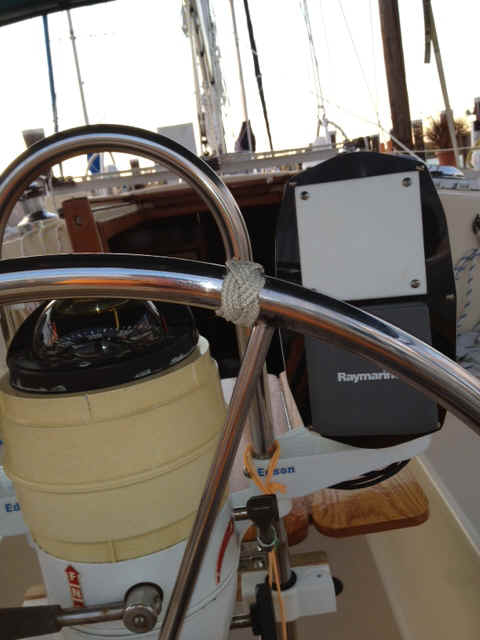 |
It is important to know when your rudder is at dead ahead. Many people,me
included, just put a piece of tape on their wheel for this purpose. With the passage
of time, heat and sun the glue on the tape deteriorates to a sticky, slimy mess. The
tape comes off, the glue residue gets on your hands. A mess. On my previous
sailboats I was a member of the messy glue club, but I always coveted the fancy knot that
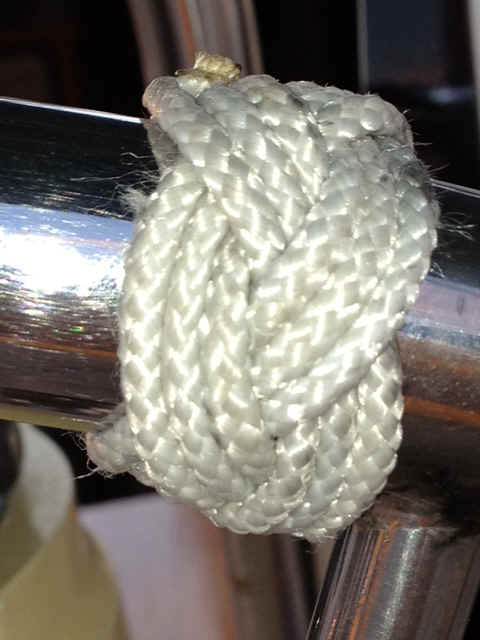
some people used to mark the dead ahead spot on their wheel. Today (9/9/2012) during
cocktail hour I got out my book "Morrow's knots" and put a Turk's Head on my
wheel. The fruit of my labor is shown at the left. It might get dirty, it might come
undone, but it won't turn into the usual gooey mess of tape. BTW, does this count as a
project for 2012 since it took mere minutes to complete? |
 |
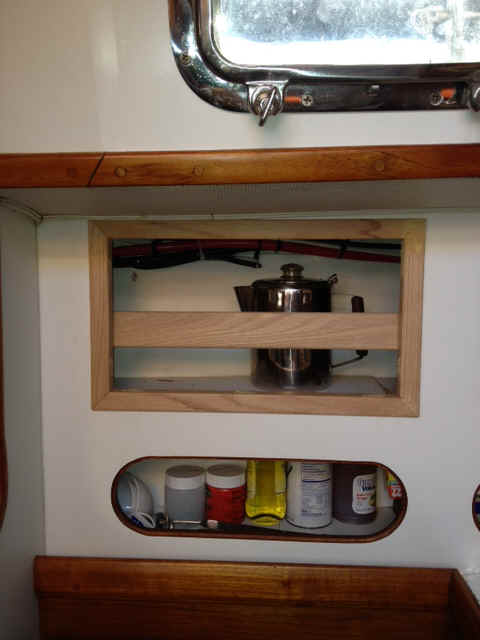 |
Go back and look at the shelf project. That's a good lad.
Notice that at the end of the sequence there is a microwave oven in the box on the shelf.
The microwave came out of the opening at the far upper left of this row. At the immediate
left is the same opening with new trim waiting to be stained. The finished product is at
the lower left. As a an added bonus I also did the retaining fiddle for the shelf
that houses my system documentation (the notebooks) and some cruising guides; lower right. |
 |
 |
 |
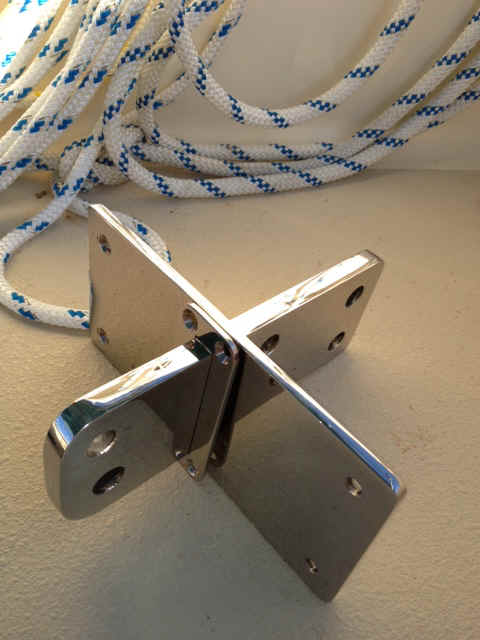 |
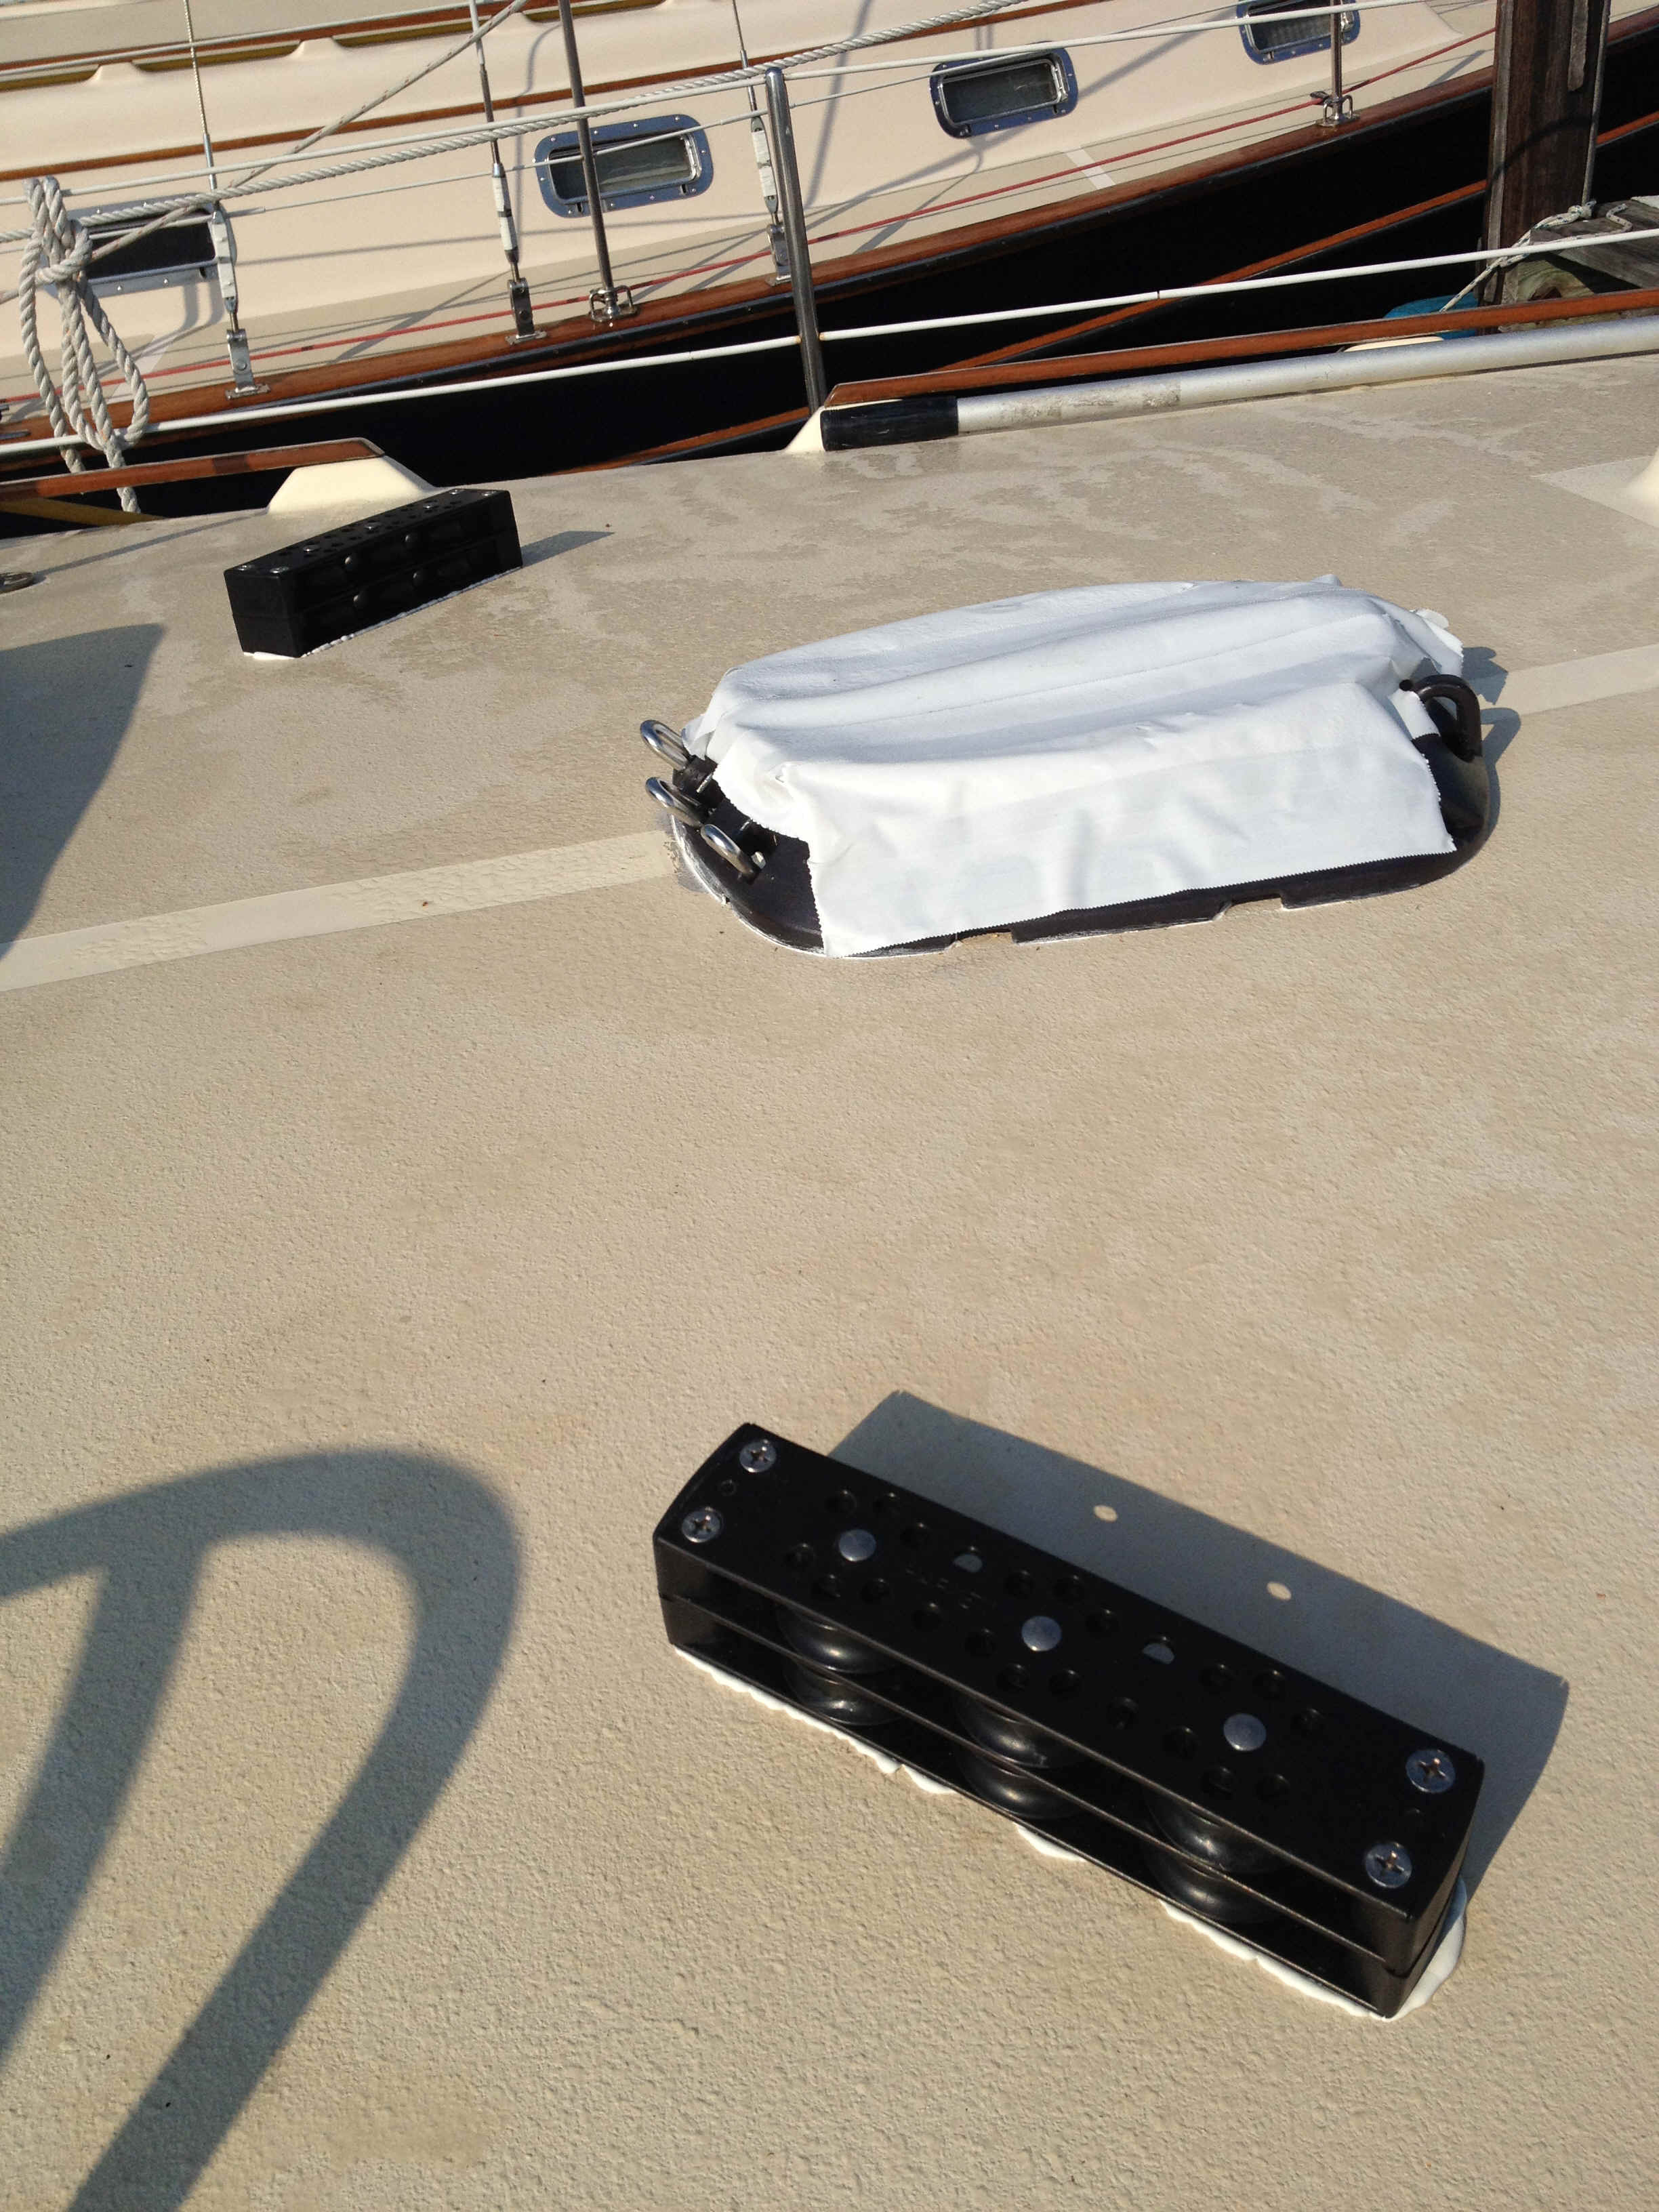
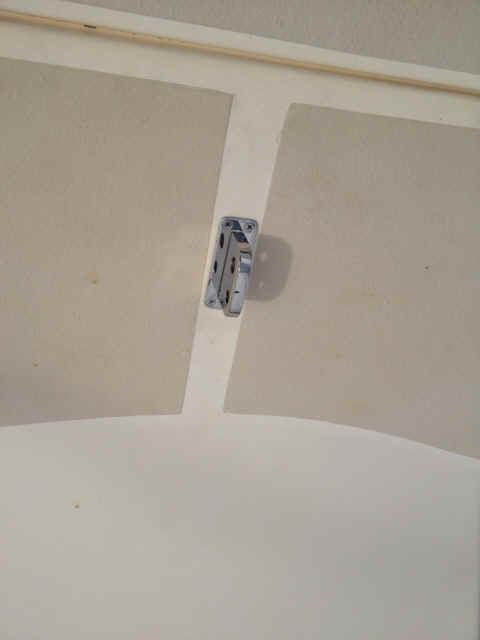
In connection with the new mast I made the decision to have an inner forestay so that
I can fly a storm sail instead of just trying to roll up the genoa into the size of hanky,
making it essentially useless. In my vintage and size of Caliber the inner forestay was an
option, but it was not chosen by the initial owner of Andante. To do the inner forestay a
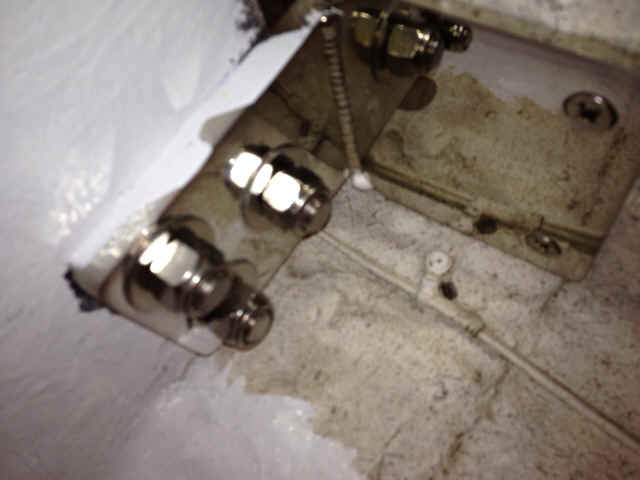
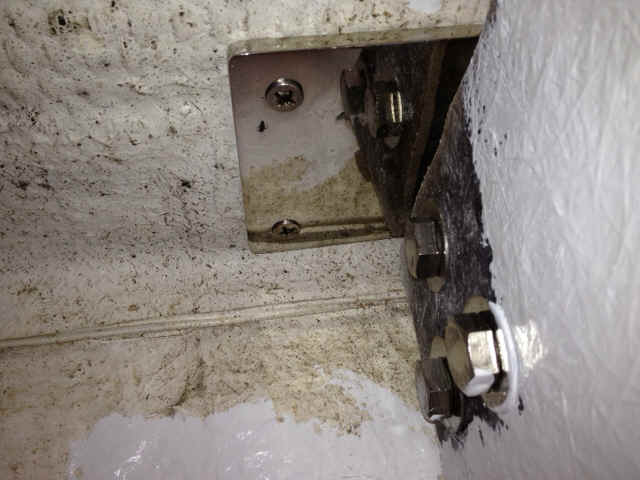
new chainplate, the beauty at the left, will be installed in the foredeck at the far left. In
the row below the new chainplate has been installed. The superb finish quality of
the new chainplate led me to remark that I should install it as a hood ornament on my new
Rolls Royce, if only I had one. You can see yourself in the highly polished surface;
more corrosion resistant. There isn't a flaw to be seen. In the row below you can
see the underside of the deck where the chainplate has been installed; attached to the
underside of the deck by its 'wings' and also attached to the longitudinal dvider in the
anchor locker. This is much better construction than is to be found on the factory
installed chainplate. BTW, if you are a Caliber owner contemplating this then be
prepared to spend 1.7 boat bucks,
|
 |
 |
 |
 |
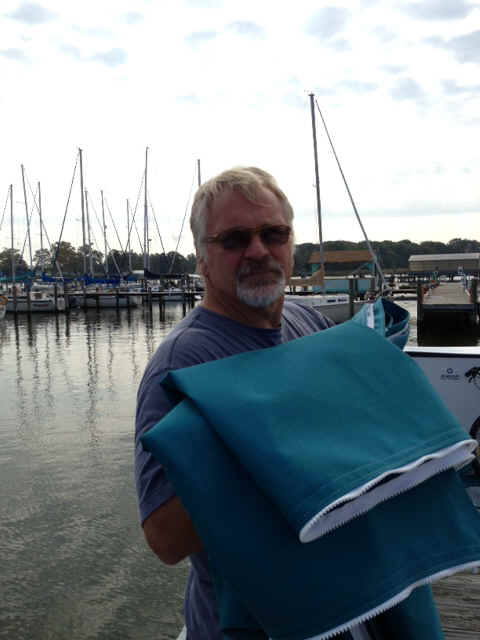 |
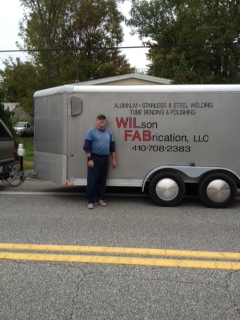
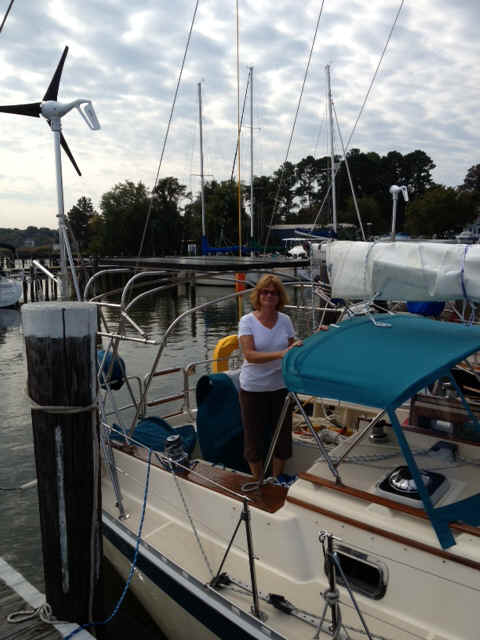
The new bimini and dodger have been built by Canvas by Victoria. Vicky is a
virtuoso of canvas work.She and her husband (who sometimes assists her) are shown at left.
Within a day of the new canvas being on the boat several people stopped by to say
"Wow, who did that for you?" |